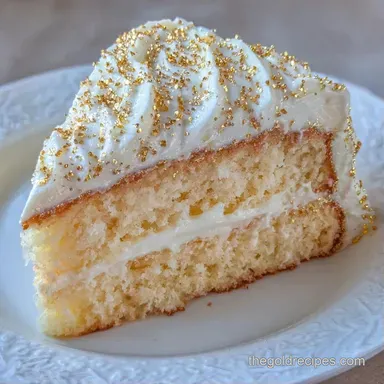
Gold Dusted Buttercream Cake: Metallic Sheen

- Time: 30 min active + 4 hrs 35 min cooling/setting
- Flavor/Texture Hook: Velvety ivory frosting with a shatter like metallic sheen
- Perfect for: High end celebrations or a viral worthy birthday centerpiece
The smell of browning butter and warm vanilla always hits me first, but it's the visual that actually sells this thing. I remember trying to make a "fancy" cake for a friend's engagement a few years back, and I just dumped edible gold powder over the top. It looked like a glitter bomb went off in a bakery.
The powder just sank into the frosting, leaving these weird, muddy yellow streaks that looked more like mustard than 24 karat gold.
The fix was actually a matter of physics, not art. I realized the frosting was too warm and too porous, which sucked the pigment right in. Now, I treat the gold like a paint rather than a sprinkle.
By mixing the dust with a tiny bit of oil and applying it to chilled buttercream, you get a mirror like finish that actually stays put. This Gold Dusted Buttercream Cake is essentially a hack to make a home kitchen look like a professional studio.
Right then, let's get into the precision. We're going for a dense but fluffy sponge and a buttercream that's stable enough to be a sculpture. It's not about luck, it's about the temperatures. If your butter is too soft, the peaks collapse. If it's too cold, you get lumps.
We're aiming for that sweet spot of 65°F (18°C) to get the aeration just right.
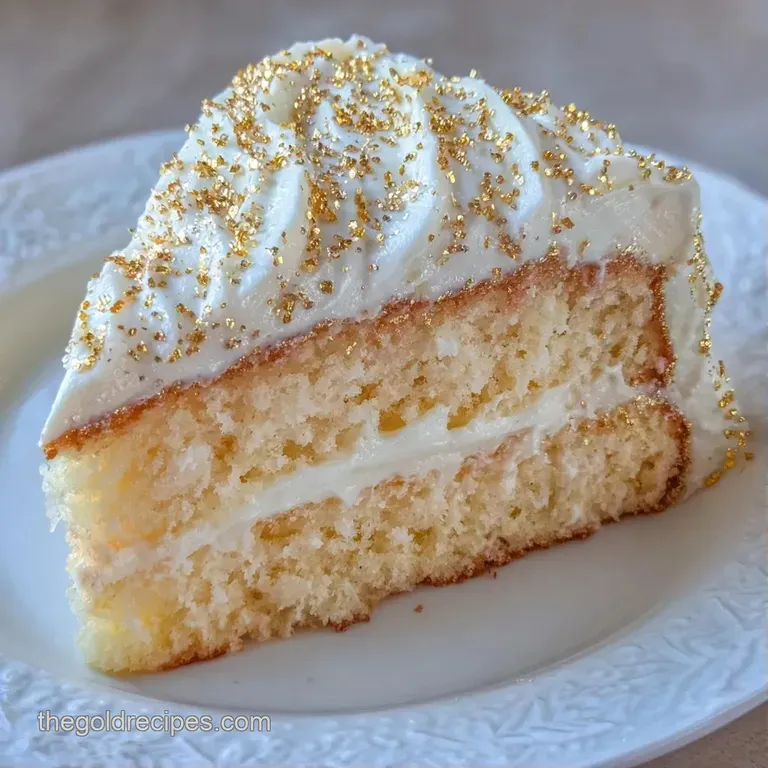
Gold Dusted Buttercream Cake
The success of this build comes down to how we manage the fats. For the cake, we're using the creaming method to trap air bubbles, which gives the sponge its lift. For the frosting, we're pushing the butter to an ivory white state, which removes the yellow tint and makes the gold pop.
It's a simple shift in technique, but it's what separates a home bake from a bakery piece.
This specific Gold Dusted Buttercream Cake requires a bit of patience during the cooling phase. You can't rush the chill. If you try to apply the gold paste to room temperature frosting, the oil in the paste will melt the butter, and you'll end up with those same muddy streaks I mentioned earlier.
Trust the timer on this one.
The Structural Stability
Air Incorporation: Beating butter and sugar for 5 full minutes creates a stable matrix of air cells. This ensures the cake doesn't collapse under the weight of the heavy buttercream.
The Cold Set Technique
Surface Tension: Chilling the frosted cake for 60 minutes firms up the fat. This creates a solid "skin" that supports the gold paste without absorbing it.
The Opacity Equation
Pigment Suspension: Mixing gold dust with vegetable oil creates a suspension. According to King Arthur Baking, the right balance of fats and leaveners helps maintain cake structure, but here, the oil acts as the vehicle to keep the gold on the surface.
| Premium Ingredients | Budget Alternatives | Impact on Result | Savings |
|---|---|---|---|
| Pure Gold Luster Dust | Yellow Gold Mica Powder | Slightly less shimmer, more "matte" look | High |
| European Style Butter | Standard Unsalted Butter | Softer peaks, slightly more yellow hue | Medium |
| Pure Vanilla Extract | Vanilla Imitation | Loss of depth in flavor, more "candy" scent | Low |
Nailing the Texture
To get this right, you have to treat your ingredients like chemical components. The butter isn't just for flavor; it's the structural glue. When we cream the butter and sugar, we're essentially creating a foam. If you stop too early, the cake will be dense and greasy.
If you go too long, you might over aerate and cause a mid oven collapse.
The frosting is where the real hacking happens. Most people just mix butter and sugar, but we're going for a "Colonial" style buttercream. This means beating the butter alone first to get it incredibly pale. This removes the natural yellow of the butter, giving us a neutral canvas for the gold.
Chef Note: If your kitchen is over 75°F, put your mixing bowl in the fridge for 10 minutes before starting the buttercream. Cold equipment prevents the butter from over softening during the friction of beating.
Technical Recipe Specs
For those who like the numbers, this is a high fat, high sugar build. It's designed for stability and visual impact. The ratio of powdered sugar to butter is roughly 1.6:1, which provides the stiffness needed for piping those sharp rosettes.
Precision Checkpoints:
- Creaming Phase: Butter and sugar must be pale ivory, not just combined.
- Baking Window: 30-35 minutes. Pull the cakes when the center springs back immediately.
- Chill Window: 30-60 minutes in the fridge before the gold is applied.
| Method | Time | Texture | Best For |
|---|---|---|---|
| Oven Bake | 35 mins | Classic crumb, airy | Standard layers |
| Slow Cooker | 90 mins | Denser, moister | Single deep cake |
The Ingredient List
For the Vanilla Sponge:
- 3 cups (375g) all purpose flourWhy this? Balanced protein for structure
- 2 cups (400g) granulated sugar
- 1 tbsp (12g) baking powderWhy this? Strong lift for heavy frosting
- 1 tsp (5g) salt
- 1 cup (225g) unsalted butter, softened
- 4 large eggs
- 1 cup (240ml) whole milk
- 2 tsp (10ml) vanilla extract
For the Colonial Buttercream:
- 2 cups (450g) unsalted butter, softened
- 6 cups (720g) powdered sugar, siftedWhy this? Prevents lumps in piping
- 1/4 cup (60ml) heavy cream
- 1 tsp (5ml) vanilla extract
- 1 pinch salt
For the Metallic Gold Finish: - 1 tbsp (10g) edible gold luster dust - 2 tsp (10ml) vegetable oil Why this? Neutral carrier for pigment
Ingredient Swaps:
| Original Ingredient | Substitute | Why It Works |
|---|---|---|
| Whole Milk (1 cup) | Buttermilk (1 cup) | Adds tang and tenderness. Note: Slightly denser crumb |
| Heavy Cream (1/4 cup) | Full fat Greek Yogurt (1/4 cup) | Similar fat content. Note: Adds a slight tang |
| All Purpose Flour | Cake Flour | Finer texture. Note: Result is softer and more fragile |
Necessary Baking Tools
You don't need a professional kitchen, but a few specific tools make this Gold Dusted Buttercream Cake possible. A stand mixer (like a KitchenAid) is highly recommended because of the amount of powdered sugar we're whipping in. Doing this by hand is a workout I wouldn't wish on anyone.
You'll also need two 8 inch cake pans and a star piping tip (like Wilton 1M or 2D). For the gold, a small, synthetic food safe paintbrush is non negotiable. A sponge or a brush with natural bristles will soak up too much of the gold paste, wasting your expensive dust.
Step-by-step Instructions
Phase 1: Baking the Foundation
- Preheat oven to 350°F (180°C), grease and flour two 8 inch cake pans.
- Cream the butter and sugar until pale and fluffy. Note: This takes about 3-5 minutes on medium high.
- Gradually add eggs one at a time, followed by vanilla extract.
- Alternate adding the flour, baking powder, and salt mixture with the milk, mixing on low until just combined. Note: Overmixing creates tunnels in the cake.
- Pour batter into pans and bake for 30-35 minutes until the center springs back when touched. Cool completely.
Phase 2: Crafting the Gold Buttercream Base
- Beat the softened butter for 5 minutes until ivory white and airy. Note: This is the "Colonial" secret for a clean color.
- Slowly add powdered sugar one cup at a time.
- Mix in heavy cream, vanilla, and salt until the buttercream is velvety and holds a stiff peak.
- Frost the cake in a smooth layer and pipe rosettes or borders using a star tip.
Phase 3: Applying the Metallic Gold Icing
- Refrigerate the cake for 30-60 minutes until the frosting feels firm to the touch.
- Combine gold luster dust and vegetable oil in a small bowl to form a thick paste.
- Use a food safe paintbrush to dab the gold paste onto the edges of the frozen buttercream rosettes.
- Allow layers to dry for 2 minutes before applying a second coat until the gold is opaque and metallic.
Troubleshooting Common Issues
When you're making a Gold Dusted Buttercream Cake, things can go sideways quickly if the temperature fluctuates. Most issues aren't about the ingredients, but the environment.
Gold is Streaky
This usually happens because the frosting was too warm. The oil in the gold paste melts the butter on contact, causing the pigment to bleed. If this happens, put the cake back in the freezer for 10 minutes and dab the streaks with a clean, dry brush to soak up excess oil before re applying.
Buttercream Too Soft
If your frosting is sliding or the peaks are drooping, you've likely got too much heavy cream or the room is too hot. Add more sifted powdered sugar, one tablespoon at a time, and beat on low.
Dust is Sinking
This occurs when the gold paste is too thin. You've likely added too much vegetable oil. Add another pinch of gold dust to thicken the paste into a "paint" consistency rather than a "syrup" consistency.
| Problem | Root Cause | Solution |
|---|---|---|
| Cake sank in middle | Too much leavening or oven door opened | Use a thermometer; check baking powder expiry |
| Frosting is grainy | Sugar wasn't sifted | Sift powdered sugar through a fine mesh strainer |
| Gold looks "muddy" | Applied to room temp frosting | Chill cake for 60 mins before painting |
Common Mistakes Checklist:
- ✓ Did I beat the butter for a full 5 minutes before adding sugar?
- ✓ Is the cake completely cold before frosting?
- ✓ Did I sift the powdered sugar?
- ✓ Is the gold paste thick, not runny?
- ✓ Did I wait 2 minutes between gold coats?
Flavor Swaps and Tweaks
If you want to change the vibe of this Gold Dusted Buttercream Cake, you can tweak the foundation without ruining the stability. The ivory buttercream is a neutral base, so you can play with the sponge.
Flavor Twists: - Lemon Gold: Replace 1/2 cup of flour with almond flour and add the zest of two lemons to the batter. This adds a bright acidity that cuts through the heavy frosting. - Chocolate Luxe: Use a dark chocolate sponge base. The contrast between the deep brown cake and the gold tipped white frosting looks incredibly high end. If you love other decadent cakes, you might enjoy my Pineapple Upside Down Cake for a different kind of fruit forward treat.
Diet Swaps: - dairy-free: Use a high-quality vegan butter stick (the kind that stays firm at room temp) and a coconut based heavy cream. - gluten-free: Use a 1:1 GF baking flour blend. Note that you may need an extra 1/2 tsp of baking powder to get the same lift.
Scaling the Recipe
When you're scaling this, remember that baking chemistry isn't always linear.
Scaling Down (Half Batch): Use one 8 inch pan instead of two. Reduce the bake time by about 20%, starting to check at 25 minutes. For the eggs, beat one egg in a small bowl and use exactly half of it by weight.
Scaling Up (Double Batch): If you're making a three tier version of the Gold Dusted Buttercream Cake, don't just double the salt and baking powder increase those by 1.5x only. Liquids can be doubled, but work in batches if your mixer can't handle 12 cups of powdered sugar.
For larger cakes, lower the oven temp to 325°F (160°C) and extend the bake time to ensure the center cooks through without burning the edges.
| Goal | Adjustment | Result |
|---|---|---|
| Smaller Cake | 1/2 batch, 1 pan | Faster bake, less waste |
| Tiered Cake | 2x batch, lower temp | Better structural support |
| Extra Shine | 1.5x gold dust | Higher opacity, mirror finish |
Storage and Waste
Because of the high butter content, this cake is best kept in the fridge. However, the gold luster dust can sometimes "sweat" if the temperature changes too rapidly.
Storage Guidelines:
- Fridge: Store in an airtight cake carrier for up to 5 days.
- Freezer: You can freeze the unfrosted layers for 3 months. Wrap them tightly in plastic wrap and foil. To thaw, let them sit in the fridge overnight before frosting.
- Reheating: Never microwave this cake. Let it sit at room temperature for 2 hours before serving to allow the buttercream to soften naturally.
Zero Waste Tips: - Buttercream Scraps: Don't throw away the leftover ivory frosting. Freeze it in small dollops on a parchment sheet. You can thaw these and use them as a topping for pancakes or cupcakes.
- Cake Trimmings: If you level your cakes with a knife, don't toss the scraps. Crumble them up, mix with a bit of the leftover frosting, and roll them into cake pops.
Best Pairing Ideas
This cake is very rich, so you want something to balance the sweetness. A tart raspberry coulis or a fresh berry medley works wonders.
If you're serving this at a party, I recommend pairing it with a sharp espresso or a cold glass of Prosecco. The bitterness of the coffee cuts right through the buttery Colonial frosting. For those who want another sweet treat on the table, these Classic Blondies offer a chewy contrast to the soft, velvety cake.
Honestly, the Gold Dusted Buttercream Cake is as much about the process as it is about the taste. Once you see that first brushstroke of gold hit the chilled frosting and stay perfectly on top, you'll realize why the temperature control is the most important part of the whole build.
It's a bit of a project, but the look of it on the table is a total win. Let's crack on and get baking.
Recipe FAQs
How to apply gold luster dust to the frosting?
Combine gold luster dust and vegetable oil in a small bowl to form a thick paste. Use a food safe paintbrush to dab the gold paste onto the edges of frozen buttercream rosettes.
How to achieve a metallic gold finish on the buttercream?
Mix gold luster dust and vegetable oil into a concentrated paint. Apply the mixture to the cake after refrigerating the frosting for 30-60 minutes to ensure the peaks are set.
Does edible gold luster dust change the taste of the cake?
No, it is tasteless. It is used purely for visual luxury and does not alter the flavor profile of the buttercream.
How to make gold paint for cake decorating?
Stir edible gold luster dust into vegetable oil until a thick paste forms. This creates a pigment that adheres well to chilled buttercream surfaces.
Is it true that you can mix food colors into the frosting to make it metallic gold?
No, this is a common misconception. Standard colors only create a matte yellow hue; for a true metallic shine, use luster dust or try these luxury gold donuts for a similar effect.
How to splash gold dust onto the cake?
Load a food safe paintbrush with gold paint. Flick the bristles toward the cake to create a speckled, artistic splatter effect.
Can you apply gold leaf to whipped cream or frosting?
Yes, you can. It adheres best to chilled surfaces, so ensure your buttercream is firm before application to prevent the leaf from sliding.
Gold Dusted Buttercream Cake