Best Classic Blondies Recipe: Chewy and Fudgy
- Time:15 minutes active + 25 minutes baking = Total 40 minutes
- Flavor/Texture Hook: Nutty browned butter with a velvety, chewy center
- Perfect for: Quick dessert cravings or a low stress bake for friends
- The Best Classic Blondies Recipe
- Why These Bars Work
- Essential Component Analysis
- The Main Ingredient List
- Necessary Kitchen Gear
- The Step-By-Step Method
- Solving Common Baking Issues
- Troubleshooting Common Issues
- Creative Flavor Tweaks
- Scaling The Batch
- Common Baking Myths
- Storage And Waste Tips
- Pro Plating Methods
- Recipe FAQs
- 📝 Recipe Card
That smell of butter foaming in a pan is where the magic starts. It begins as a simple sizzle, then shifts into a deep, toasted aroma that fills the whole kitchen. I remember the first time I tried to decode why some blondies tasted like bland cookies while others tasted like liquid gold.
It came down to how you treat the butter.
Blondies are a staple of the American mid century kitchen, essentially the chocolate free cousin of the brownie. For decades, they were the go to treat when the pantry was out of cocoa but full of brown sugar.
They represent a specific kind of comfort, leaning on the rich, molasses notes of the sugar rather than the intensity of chocolate.
This version is all about precision. We aren't just mixing ingredients, we're manipulating fats and sugars to get a specific mouthfeel. By the time you're done, you'll see why this best classic blondies recipe beats the generic ones you find on the back of a flour bag.
The Best Classic Blondies Recipe
Right then, let's get into the mechanics. The goal here is a "fudgy blondie recipe" that doesn't lean too hard into the "cake" territory. To do that, we use a higher fat to flour ratio. This keeps the structure dense and ensures the bars stay moist long after they leave the oven.
Most people treat these like cookies, but they are actually closer to a custard based bar. If you overwork the batter, you develop too much gluten, and suddenly you've got a sponge cake. To avoid that, we fold the dry ingredients in gently. Trust me on this, stop stirring the second the flour streaks vanish.
If you love this kind of dense, sugary treat, you might also enjoy the contrast of something fruity, like these Mini Pineapple Upside Down Cakes, which offer a different kind of sweetness. But for now, let's focus on the butterscotch like depth of these bars.
Why These Bars Work
I like to think of baking as a series of hacks. Instead of just following a list, I want to decode why these specific steps create that signature chew.
- Brown Butter Base: Cooking the butter until the milk solids toast creates a nutty, complex flavor that masks the "raw flour" taste.
- Sugar Aeration: Beating the egg and brown sugar vigorously creates tiny air pockets that support the structure without needing extra flour.
- Low Leavening: Using a tiny amount of baking powder ensures a slight lift but keeps the center velvety and dense.
- Moisture Lock: The molasses in light brown sugar attracts water, preventing the bars from drying out during the 25 minutes in the oven.
The biggest difference in results usually comes from how you heat your butter. I've tested this both ways, and the stovetop method is superior for flavor.
| Method | Time | Texture | Best For |
|---|---|---|---|
| Stovetop Browning | 5-7 mins | Deep, nutty, complex | The best classic blondies recipe |
| Microwave Melting | 2 mins | Standard butter taste | When you're in a massive rush |
By taking those extra few minutes on the stove, you change the chemical profile of the fat, which is the secret to a professional grade result.
Essential Component Analysis
To really hack this recipe, you need to understand what each ingredient is actually doing in the pan. It's not just about taste, it's about the physics of the bake.
| Ingredient | Science Role | Pro Secret |
|---|---|---|
| Browned Butter | Fat & Flavor | Brown it until it smells like toasted hazelnuts |
| Brown Sugar | Texture & Color | Don't use granulated sugar or you'll lose the chew |
| Large Egg | Binding & Lift | Room temperature eggs emulsify much faster |
| AP Flour | Structure | Sift it to avoid clumps in the dense batter |
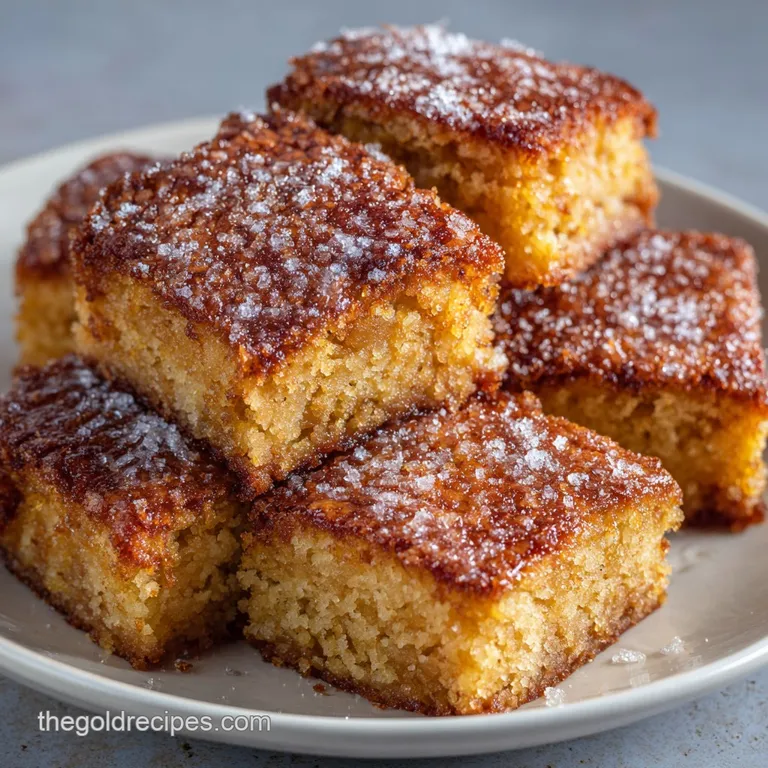
The interaction between the brown sugar and the browned butter creates a natural caramelization. This is what gives "blonde brownies recipe" their characteristic golden hue and that slightly tacky, fudgy top.
The Main Ingredient List
Here is everything you need. I've kept the list tight, focusing only on what's necessary for that specific texture.
- 3/4 cup (170g) unsalted butter Why this? Base for flavor and moisture
- Substitute: Salted butter (reduce added salt by 1/4 tsp)
- 1 cup (200g) packed light brown sugar Why this? Provides the chewy, molasses depth
- Substitute: Dark brown sugar for a deeper, more caramel like taste
- 1 large (50g) egg, room temperature Why this? Binds everything and adds lift
- Substitute: Flax egg (will result in a denser, nuttier bar)
- 2 tsp (10ml) pure vanilla extract Why this? Cuts through the richness of the butter
- Substitute: Maple syrup for a woody, autumnal vibe
- 1 cup (125g) all purpose flour Why this? Provides the necessary structure
- Substitute: gluten-free 1:1 blend (may require 1 extra tbsp of milk)
- 1/2 tsp (3g) baking powder Why this? Adds a tiny bit of aeration
- Substitute: 1/4 tsp baking soda + 1/2 tsp cream of tartar
- 1/4 tsp (1.5g) salt Why this? Balances the sugar
- Substitute: Sea salt for a cleaner flavor profile
- 1 cup (170g) semi sweet chocolate chips Why this? Classic contrast to the butterscotch
- Substitute: White chocolate chips or chopped walnuts
I honestly don't even bother with low-fat butter here. You need the full fat content to get that velvety mouthfeel. If you use a substitute like margarine, you'll lose the ability to brown the butter, which is the core of this homemade blondies recipe.
Necessary Kitchen Gear
You don't need a fancy setup, but a few specific tools make the process smoother.
- 8x8 inch metal baking pan: Metal conducts heat faster than glass, giving you those crispy, golden edges.
- Parchment paper: Essential for lifting the bars out without them breaking.
- Medium saucepan: For browning the butter without it overflowing.
- Whisk and Spatula: Use the whisk for the sugar/egg and the spatula for folding the flour.
If you have a stand mixer such as a KitchenAid, you can use it for the egg and sugar stage, but a hand whisk is usually enough and keeps the cleanup simple.
The step-by-step Method
Now we put the theory into practice. Follow these steps exactly to ensure your "easy blondie recipe" turns out perfectly.
Browning The Butter
Melt the butter in a saucepan over medium heat, whisking constantly as it foams. Wait until small brown specks appear and a nutty aroma develops, then remove from heat immediately. Note: This happens fast, so don't walk away from the stove.
Emulsifying The Base
Whisk the browned butter and brown sugar together until smooth. Add the egg and vanilla extract, beating vigorously for 1-2 minutes. Look for the mixture to become pale and slightly fluffy. Note: This aeration is the secret to avoiding a rock hard bar.
Folding The Flour
Sift in the flour, baking powder, and salt. Use a spatula to fold the mixture gently. Stop the moment no flour streaks remain. Note: Overmixing at this stage creates gluten, which makes the bars cakey.
Adding The Mix ins
Fold in the chocolate chips. Spread the batter into your lined 8x8 inch metal baking pan. Press it down evenly with your spatula so the edges don't overcook while the middle stays raw.
Baking To Perfection
Bake at 350°F (175°C) for 25 minutes. Pull them out when the edges are golden brown and pulling away from the sides, but the center still looks slightly underbaked. Note: They will firm up as they cool.
The Final Rest
Let the pan cool completely in the pan for at least 30 minutes. Wait until the bars feel set to the touch before lifting the parchment paper to move them.
Solving Common Baking Issues
Even with a precise plan, baking can be temperamental. Most issues with "classic blonde brownies" come down to temperature or timing.
Troubleshooting Common Issues
| Issue | Solution |
|---|---|
| Why Your Blondies Are Cakey | This usually happens because of too much air or too much flour. If you beat the batter after adding the flour, you've introduced too much oxygen and developed gluten. The result is a texture more like |
| Why Your Tops Are Greasy | Greasy tops happen when the butter separates from the sugar. This is often caused by using cold eggs or not beating the sugar and egg long enough to create a stable emulsion. |
| Why the Center Stays Raw | If the edges are burnt but the middle is liquid, your oven might be running too hot, or you're using a glass pan which insulates the heat differently than metal. |
Precision Checklist for Success:
- ✓ Butter reached "nutty" smell and visible brown specks.
- ✓ Egg and sugar beaten for 1-2 minutes until pale.
- ✓ Flour folded in only until streaks disappeared.
- ✓ Removed from oven while center was still slightly soft.
Creative Flavor Tweaks
Once you've nailed the best classic blondies recipe, you can start hacking the flavors. The brown butter base is incredibly versatile.
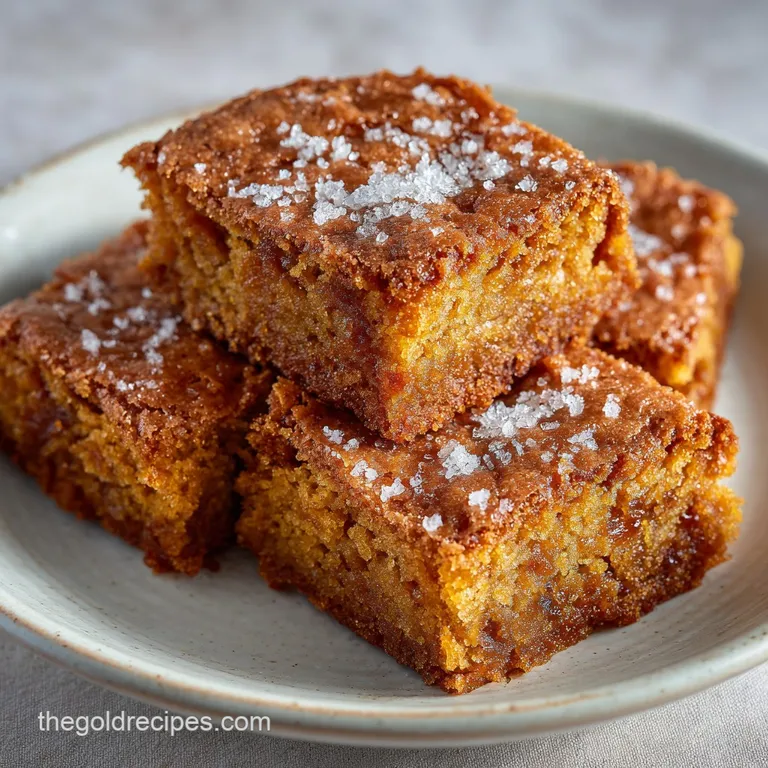
- Salty Sweet Twist: Sprinkle flaky sea salt on top immediately after taking them out of the oven.
- White Chocolate Dream: Swap semi sweet chips for white chocolate and add a teaspoon of lemon zest to the batter to cut the sweetness.
- The Nutty Crunch: Replace half the chocolate chips with toasted pecans or walnuts.
If you're serving these at a party, they pair well with a savory appetizer to balance the sugar. While this is a dessert, I often find that having something salty, like a Classic Crockpot Potato Soup, earlier in the evening makes the dessert hit harder.
Scaling The Batch
Sometimes you need a small treat, and other times you're feeding a crowd. Here is how to adjust the ratios.
Scaling Down (1/2 Batch): Use a 4x8 inch loaf pan. Reduce the baking time by about 20% (start checking at 18-20 minutes). For the egg, crack one into a bowl, whisk it, and use exactly 25g (half).
Scaling Up (2x Batch): Use two 8x8 pans rather than one giant pan to ensure the centers cook properly. Lower the oven temp to 325°F (160°C) and extend the bake time by 5-10 minutes to prevent the edges from scorching before the middle sets.
Keep salt and baking powder at 1.5x instead of 2x to avoid a metallic taste.
Right then, remember that when doubling, you should work in batches if your bowl is small. Overcrowding the bowl makes it harder to fold the flour gently, increasing the risk of a cakey texture.
Common Baking Myths
There are a few things people tell you about blondies that are just wrong. Let's decode them.
Myth: More flour makes them thicker. Actually, adding more flour just makes them cakey and dry. Thickness comes from the volume of the batter and the size of the pan. Stick to the 1 cup measurement for the best results.
Myth: You must use a toothpick to check for doneness. In a fudgy recipe, a toothpick coming out "clean" means you've overbaked them. You want a few moist crumbs clinging to the toothpick. If it's clean, they'll be dry by the time they cool.
Storage And Waste Tips
To keep that velvety texture, you have to store these correctly.
Storage Guidelines: Keep them in an airtight container at room temperature for up to 4 days. For longer storage, put them in the fridge for up to a week. To reheat, pop a square in the microwave for 10 seconds to bring back that "just baked" softness.
Freezing Tips: These freeze brilliantly. Wrap individual squares in parchment paper and place them in a freezer bag for up to 3 months. Thaw in the fridge overnight.
Zero Waste Hack: If you have a bit of browned butter left in the pan, don't wash it away. Whisk it into your morning oatmeal or drizzle it over sautéed spinach for a nutty, savory boost.
Pro Plating Methods
The way you cut these determines if they look like a home cook's experiment or a professional bakery item.
The Clean Cut: Wait until the bars are completely cold. Use a long, sharp knife. Heat the blade under hot water for 30 seconds, wipe it dry, and make one clean slice. Wipe the blade and reheat it between every single cut. This prevents the chocolate chips from pulling and tearing the bar.
For a high end look, cut them into small 1 inch squares rather than large rectangles. It makes them feel like "bonbons" and allows the rich flavor to be more balanced. This final touch is what really cements this as the best classic blondies recipe for any occasion.
Recipe FAQs
Why are my blondies cakey instead of chewy?
Too much air or flour. Overbeating the batter after adding flour develops gluten and introduces oxygen, which creates a cake like texture instead of a dense one.
Why do my blondies have a greasy top?
The butter separated from the sugar. This typically happens if you use cold eggs or fail to beat the sugar and egg long enough to create a stable emulsion.
How to brown the butter for this recipe?
Melt butter in a saucepan over medium heat while whisking constantly. Remove the pan from heat immediately once small brown specks appear and a nutty aroma develops.
How to tell when the blondies are finished baking?
Look for golden brown edges that are pulling away from the sides of the pan. The center should still be slightly underbaked to ensure a fudgy consistency.
How long do blondies stay fresh at room temperature?
Up to 4 days in an airtight container. For longer storage, you can keep them in the fridge for up to one week.
Is it true that stirring the batter after adding flour doesn't affect the texture?
No, this is a common misconception. You must fold the flour in gently; overmixing creates a cakey result rather than a chewy bar.
Can I make a no-bake version of this treat?
Yes, by omitting the baking process. For a similar flavor profile that requires no oven time, try our edible cookie dough.
Best Classic Blondies Recipe

