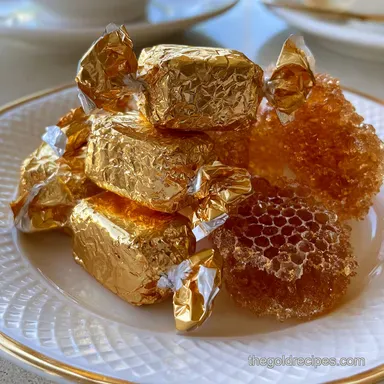
Simple Gold Foil Candy: Shatter-Crisp Texture
- Time: 10 min active + 30 min cooling = Total 40 minutes
- Flavor/Texture Hook: Deep amber sugar with a light, airy crunch
- Perfect for: Party favors, luxury gift bags, or a nostalgic treat
- Simple Gold Foil Candy Secrets
- Precision Component Analysis
- Shopping List Breakdown
- Required Gear List
- Step-by-Step Instructions
- Fixing Common Candy Fails
- Troubleshooting Common Issues
- Adjusting the Batch Size
- Debunking Candy Myths
- Storage Guidelines
- Best Pairing Suggestions
- Recipe FAQs
- 📝 Recipe Card
Ever wondered why some candies have those tiny, iridescent bubbles trapped inside a golden shell? It's not magic, it's just a rapid release of carbon dioxide hitting a super heated sugar syrup. I remember the first time I tried this - the sound is what gets you.
It's a violent, sudden hiss that makes the pot look like it's about to erupt.
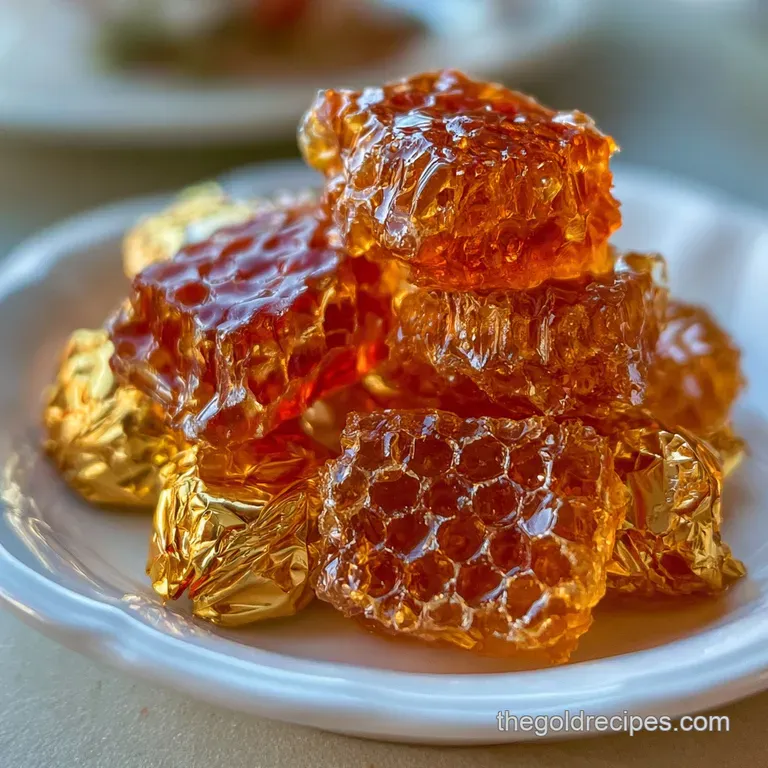
The visual is even better. You start with a clear, syrupy liquid and, in a split second, it transforms into a pale, foaming cloud. Once it sets, you've got this brittle, airy structure that feels like a luxury confection.
Making a Simple Gold Foil Candy is honestly more about timing than "skill," which is why I love decoding it.
You don't need a professional kitchen for this, just a bit of patience and a thermometer. We're going to turn a few pantry staples into something that looks like it came from a high end boutique. Let's crack on.
Simple Gold Foil Candy Secrets
CO2 Expansion: Baking soda reacts with the heat and acid in the syrup to create gas bubbles, which get trapped as the sugar hardens.
Crystallization Block: Corn syrup prevents the granulated sugar from recrystallizing, ensuring the candy is smooth rather than grainy.
Maillard Reaction: Heating the sugar to 300°F triggers a chemical change that creates those deep, nutty, mahogany notes.
Thermal Shock: Pouring the hot foam onto a cool sheet stops the cooking process immediately, preserving the airy structure.
| Feature | Homemade Sponge | store-bought Candy | Impact |
|---|---|---|---|
| Texture | Shatter crisp | Often chewy/dense | Better mouthfeel |
| Flavor | Pure caramelized | Artificial vanilla | Cleaner taste |
| Control | Adjusted sweetness | High corn syrup | Less cloying |
Right then, before we start, it's important to understand that temperature is everything here. If you're off by even five degrees, the texture shifts from "airy" to "rock hard." According to Serious Eats, reaching the hard crack stage is vital for that specific snap.
Precision Component Analysis
| Ingredient | Science Role | Pro Secret |
|---|---|---|
| Granulated Sugar | Structure | Use a fine grain sugar for faster melting |
| Corn Syrup | Stabilizer | Prevents "graininess" in the final set |
| Baking Soda | Aerator | Sift it first to avoid clumps in the foam |
| Water | Solvent | Just enough to dissolve sugar without adding bulk |
I've found that using a heavy bottomed pot is non negotiable. Thin pots create "hot spots" that burn the sugar before the rest of the mixture reaches the target temp. Honestly, don't even bother with a thin aluminum pan; you'll just end up with bitter, burnt streaks.
Shopping List Breakdown
- 2 cups (400g) granulated sugar Why this? Provides the main structure and caramel flavor
- 1/2 cup (120ml) light corn syrup Why this? Keeps the sugar from crystallizing
- 1/4 cup (60ml) water Why this? Helps dissolve sugar evenly
- 1 1/2 tbsp (22g) baking soda Why this? Creates the signature airy bubbles
- 60 pieces gold foil candy wrappers Why this? Adds the luxury visual appeal
| Original Ingredient | Substitute | Why It Works |
|---|---|---|
| Light Corn Syrup | Brown Rice Syrup | Similar viscosity. Note: Adds a slightly malty flavor |
| Granulated Sugar | Caster Sugar | Finer grains melt faster. Note: No change in final texture |
| Gold Foil | Silver/Red Foil | Purely aesthetic. Note: No impact on taste |
If you love this kind of sweet chemistry, you might also enjoy my Classic Blondies recipe, which uses a similar butter sugar emulsion for that chewy texture.
Required Gear List
- Digital candy thermometer (Essential)
- Heavy bottomed saucepan
- Large baking sheet
- Parchment paper
- Metal whisk
Step-by-step Instructions
Phase 1: Preparing the Landing Zone
- Line a large baking sheet with parchment paper. Note: Do not grease the paper, as the candy needs to grip the surface to cool evenly.
Phase 2: The Heat Phase
- Combine the granulated sugar, light corn syrup, and water in your heavy saucepan.
- Heat over medium high, stirring only until the sugar dissolves.
- Stop stirring completely once it begins to boil. Note: Stirring during the boil can introduce crystals, making the candy grainy.
- Monitor the syrup with your thermometer until it hits 300°F (149°C) and looks like deep mahogany amber.
Phase 3: The Magic Reaction
- Remove the pot from heat immediately.
- Quickly whisk in the baking soda until the mixture foams up violently.
- Pour the foaming mass onto the parchment paper. Note: Do not spread it with a spatula or you'll pop the bubbles.
Phase 4: The Cooling & Wrapping
- Let the candy cool for 15-20 minutes until it is hard and brittle.
- Break the slab into irregular chunks and wrap each piece in gold foil.
Chef's Tip: If you want an even deeper flavor, let the syrup go to 310°F, but watch it like a hawk. One second more and it's burnt.
Fixing Common Candy Fails

Troubleshooting Common Issues
| Issue | Solution |
|---|---|
| Why Your Candy is Rock Hard | If your Simple Gold Foil Candy doesn't have those airy holes, you likely didn't whisk the baking soda in fast enough or the syrup wasn't hot enough. The gas escapes if the temperature drops too quickl |
| Why the Syrup is Grainy | This happens when sugar crystals form on the side of the pot and fall back into the mix. You can prevent this by using a wet pastry brush to wash down the sides of the pot during the initial heating p |
| Why the Candy is Sticky | Sticky candy usually means it didn't reach 300°F. If it stays in the "soft crack" stage, it will absorb moisture from the air and turn into a gummy mess. |
Common Mistakes Checklist
- ✓ Always use a digital thermometer, never guess by color.
- ✓ Never stir the syrup once it starts boiling.
- ✓ Use fresh baking soda (test it with vinegar to ensure it fizzes).
- ✓ Do not press down on the foam while it's setting.
Adjusting the Batch Size
Scaling Down
For a smaller batch (half), use a smaller saucepan to prevent the syrup from evaporating too quickly. Reduce the cooling time by about 20%, as the thinner slab will lose heat faster.
Scaling Up
When doubling the recipe, work in batches. Too much syrup in one pot makes it harder to whisk in the baking soda quickly enough, and you'll end up with uneven aeration. Only increase salt or extracts to 1.5x the original ratio to avoid overpowering the caramel.
| Goal | Action | Result |
|---|---|---|
| Extra Airy | Add 1/4 tsp extra soda | More bubbles, slightly more "soapy" taste |
| More Chewy | Stop at 280°F | Less brittle, more like a taffy |
| Richer Color | Heat to 310°F | Intense bitter sweet caramel |
Debunking Candy Myths
Myth: Adding butter makes it "professional." Adding butter creates a fudge or toffee. For this specific airy candy, fat interferes with the bubble structure and can make the candy collapse.
Myth: You can use a microwave. Microwaves heat unevenly. You cannot precisely control the temperature to hit 300°F without risking scorched sugar pockets. Stick to the stovetop.
Storage Guidelines
Fridge: Store in an airtight container for up to 14 days. However, the fridge can introduce moisture, which kills the crunch.
Freezer: You can freeze these for 2 months, but keep them wrapped in foil and place them in a heavy duty freezer bag to prevent odor absorption.
Zero Waste: If you have "candy dust" or tiny fragments left over, don't toss them. Toss them into a blender with some cream and a pinch of salt to make a quick caramel sauce for ice cream.
Best Pairing Suggestions
These Gold Foil Wrapped Chocolate Balls (if you dip the candy in chocolate first) go great with a sharp espresso or a bitter dark roast coffee to balance the sweetness.
If you're serving these as part of a larger spread, I'd recommend pairing them with something tart. My Classic Cranberry Sauce provides a great acidic contrast if you're serving a holiday dessert platter. Trust me, the mix of bitter caramel and tart fruit is a win.
Recipe FAQs
Why is my candy rock hard instead of airy?
You likely whisked the baking soda too slowly or the syrup cooled too quickly. The gas must be trapped immediately to create the signature airy holes.
How to prevent the syrup from becoming grainy?
Use a wet pastry brush to wash down the sides of the pot. This removes sugar crystals before they can fall back into the mix and cause graininess.
Can I grease the baking sheet for easier removal?
No, avoid greasing the parchment. Grease can interfere with how the candy sets and releases from the paper.
What temperature should the syrup reach for the correct amber color?
Heat the mixture to exactly 300°F (149°C). This ensures the sugar caramelizes into a deep mahogany hue before you add the baking soda.
Is it true I should stir the syrup once it begins to boil?
No, this is a common misconception. Stop stirring completely once the boil starts to prevent crystallization and maintain a smooth texture.
How to store these candies to keep them crunchy?
Keep them in an airtight container at room temperature. While the fridge works for 14 days, the moisture can ruin the brittle texture.
Can I use the broken candy fragments for other desserts?
Yes, blend them with cream and a pinch of salt. This makes a quick caramel sauce, providing a sweet contrast similar to the flavors in our pineapple upside down cakes.
Simple Gold Foil Candy