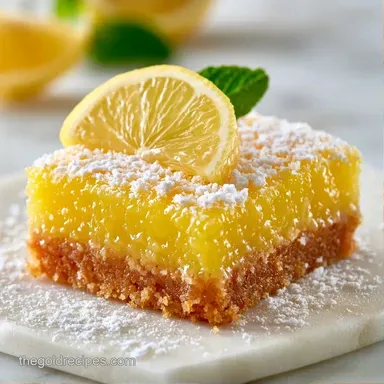
Lemon Cookie Bars Recipe in 50 Minutes

- Time: 15 min active + 25 min baking
- Flavor/Texture Hook: Zesty citrus brightness paired with a buttery, crisp base
- Perfect for: Bright afternoon teas or spring brunch gatherings
The aroma of fresh lemon zest wafting through a warm kitchen is the essence of spring. I love serving these during April gatherings, exactly when people are craving something lighter and more vibrant than heavy winter sweets. The contrast between the sharp filling and the buttery crust is always a hit with guests.
This dessert satisfies two desires in one bite: the crispiness of a sugar cookie and the tangy creaminess of a lemon tart. This Lemon Cookie Bars Recipe focuses on precise ratios to ensure the crust stays firm and the filling tastes fresh and natural.
You'll get a bar that's sturdy enough to hold but melts instantly on the tongue. It's essentially a portable version of a classic lemon tart. While we're using basic ingredients, the specific technique gives these a polished, bakery quality finish.
Quick Specs for Lemon Bars
Depending on how you prep, you can change the vibe of these bars. Some people prefer a thinner, crispier base, while others want a thick, cakey bottom.
| Goal | Change | Impact |
|---|---|---|
| Extra Tang | Add 1 tsp lemon zest to crust | More aromatic base |
| Chewier Texture | Replace 2 tbsp AP flour with cornstarch | More "candy like" bite |
| Lighter Finish | Use 1/2 cup powdered sugar for dusting | Classic bakery look |
This approach lets you tweak the Lemon Cookie Bars Recipe based on who you're feeding. If you're serving kids, maybe lean into the sweetness. For adults, go heavy on the zest.
Key Baking Techniques Explained
The physics of this bake come down to aeration and acidity. Most people just stir the filling, but that's where they miss out on the texture.
Egg Aeration: Beating eggs and sugar until pale creates a foam that traps air, which keeps the filling from becoming a dense, rubbery slab. Zest vs Juice: Juice provides the sharp acidity, but the zest contains essential oils that provide the actual "lemon" aroma.
It's a simple bit of chemistry. Without that air in the eggs, the lemon filling wouldn't have that specific, soft set consistency.
What Each Ingredient Does
Before you start, let's look at the components. Every item here has a job to do in the Lemon Cookie Bars Recipe.
| Component | Purpose | Substitute Notes |
|---|---|---|
| Unsalted Butter | Provides fat for the shortbread snap | Salted butter works, but reduce added salt |
| Large Eggs | Bind the filling and provide lift | Flax eggs will make it denser and grainier |
| Fresh Lemon Juice | Main flavor and acidity | Bottled juice is flatter and less bright |
| All Purpose Flour | Structure for the base and filling | Almond flour makes it gluten-free but softer |
Since we're focusing on a clean, sharp flavor, I suggest sticking to fresh lemons. According to USDA FoodData, the vitamin C and acidity in fresh lemons are far more potent than processed versions, which helps keep the flavor from feeling artificial.
The Full Ingredient List
For the Shortbread Base: 1 cup (125g) all purpose flour Why this? Standard protein level for a tender crust 1/4 cup (50g) granulated sugar 1/2 cup (113g) unsalted butter, softened Why this? Easier to cream for a smooth dough 1/4 tsp (1.5g)
Salt 1 tbsp (6g) lemon zest
For the Lemon Filling: 2 large (100g) eggs 1/2 cup (100g) granulated sugar 2 tbsp (16g) all purpose flour Why this? Prevents the filling from weeping 1/4 cup (60ml) freshly squeezed lemon juice 1 tbsp (6g) lemon zest 1/2 tsp (2g) vanilla extract Why
This? Rounds out the sharp citrus edge
Tools You'll Need
A few key tools will simplify the process. I prefer an 8x8 inch square baking pan. Be aware that a 9x9 pan results in thinner bars that bake more quickly, so monitor them closely.
Parchment paper is essential. I suggest creating a "sling" by letting the paper hang over the edges by a few inches. This allows you to easily lift the entire slab out of the pan after cooling, avoiding any struggling with a knife to free the edges.
For the filling, a stand mixer (such as a KitchenAid) or a hand mixer works best. While you can use a whisk, it will take roughly five minutes of manual effort to get the eggs to a pale consistency.
Bringing It Together
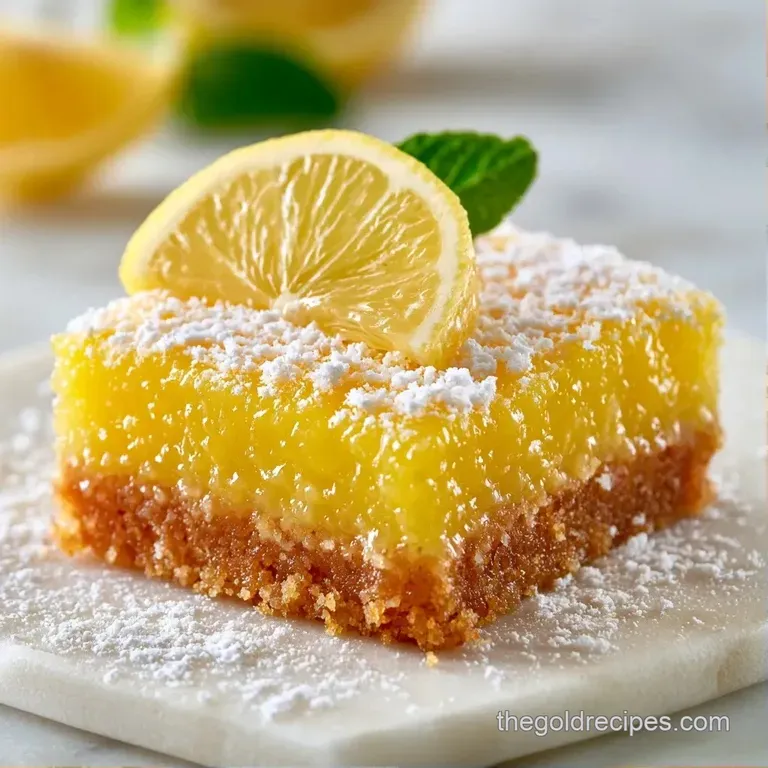
Right then, let's get into the process. Follow these steps closely to ensure the layers stay separate.
Phase 1: Crafting the Base
- Preheat your oven to 350°F (175°C) and line an 8x8 inch baking pan with a parchment paper sling.
- Cream together the softened butter and 1/4 cup sugar until smooth. Note: Don't over beat, just get it combined.
- Stir in 1 cup flour, salt, and 1 tbsp lemon zest until a soft dough forms.
- Press the dough evenly into the bottom of the prepared pan.
- Bake for 12-15 minutes until the edges are barely golden.
Phase 2: Whisking the Custard
- While the crust is baking, beat the eggs and 1/2 cup sugar in a bowl until the mixture is pale and slightly thickened.
- Sift in 2 tbsp flour and whisk until no lumps remain.
- Stir in the fresh lemon juice, 1 tbsp lemon zest, and vanilla extract until the batter is velvety and smooth.
Phase 3: The Final Bake
- Pour the lemon filling directly over the hot crust.
- Return the pan to the oven and bake for another 15-20 minutes until the center is set but still has a slight jiggle.
- Allow the bars to cool completely in the pan before lifting them out to slice.
Chef's Tip: If you have a torch, you can lightly brown the top of the bars for a toasted look, though the classic powdered sugar dust is usually the way to go.
How to Fix Common Problems
Even with a reliable guide, a few mishaps can occur. Most often, these stem from mixing errors or temperature fluctuations.
If your crust shrinks, it's likely because the dough was too warm or you over worked the flour. Too much mixing develops excess gluten, which acts like a rubber band and pulls away from the edges while baking. Next time, ensure you press the dough firmly into the corners.
Cracks on the surface usually indicate the bars stayed in the oven too long. Your best indicator is a "slight jiggle." If the center is completely stiff, you've overbaked them, causing moisture to evaporate and the top to crack.
When the bars are too soft to slice, it's almost always a cooling issue. Slicing while they are still warm means the custard hasn't fully set. Let them rest for at least two hours, or pop them in the fridge.
| Problem | Root Cause | Solution |
|---|---|---|
| Shrinking Crust | Over mixing or low pressure | Press dough firmly into corners |
| Cracked Top | Overbaked filling | Remove when center still jiggles |
| Gooey Center | Sliced while warm | Cool completely before lifting |
| Dull Flavor | Old lemons or low zest | Use fresh fruit and extra zest |
Make It Your Own
After mastering the base, you can begin experimenting with the flavors. For a richer, more decadent treat, transform these into Lemon Cheesecake Cookie Bars by folding 4oz of softened cream cheese into the filling.
To change the texture, try using a cocoa powder base. The bitterness of the chocolate complements the tart lemon perfectly. If you prefer a chewy, caramelized crust, you might like my Classic Blondies Recipe for a similar style of bar.
You can also add a fruity touch by pressing fresh raspberries into the top of the filling before the second bake. These berries burst in the oven, creating small pockets of jammy sweetness that balance the acidity.
Storage & Reheating
These bars keep well, but they need to stay chilled to maintain that clean slice. Store them in a single layer in a container with parchment paper between layers. They'll stay fresh in the refrigerator for about 4 days.
If you want to freeze them, slice them first. Place the individual bars on a tray and freeze for an hour before moving them to a freezer bag. They'll last about 2 months. To eat them, just let them thaw in the fridge overnight.
Don't bother reheating these in the microwave, as it will turn the shortbread soggy and make the filling runny. They are best served cold or at room temperature.
To avoid waste, don't throw away your lemon peels. I usually freeze my leftover zested peels in a bag. Once I have enough, I simmer them with sugar and water to make a simple lemon syrup for cocktails or pancakes.
What to Serve This With
Due to their tartness, these pair beautifully with neutral or creamy sides. Adding a dollop of unsweetened whipped cream is a great way to soften the lemon's intensity.
If you are organizing a dessert table, these offer a light contrast to more decadent options. They serve as a wonderful accompaniment to a Classic Pineapple Upside Down Cake for any tropical themed event.
As for drinks, a light Earl Grey tea or chilled Prosecco works best. The tannins from the tea or the sparkle of the wine cut through the rich, buttery crust, cleansing your palate as you enjoy the Lemon Cookie Bars Recipe.
In many cases, a bold cup of black coffee is the ideal choice. The roast's bitterness and the lemon's zing create a sophisticated balance that awakens the palate.
Recipe FAQs
How to make lemon bars?
Press a shortbread crust into a pan and bake at 350°F. Pour the lemon filling over the hot crust and bake for another 15-20 minutes until the center is set.
Can you stop the bars from sticking to the pan?
Use a parchment paper sling. This allows you to lift the entire block of bars out effortlessly once they have cooled completely.
Is it true that parchment paper is unnecessary for baking?
That's a myth. Without it, the sticky lemon filling often bonds to the pan, making it nearly impossible to get clean slices.
What alternatives exist for parchment paper?
Grease the pan heavily with butter. If you enjoyed mastering the fat-to-flour balance in this crust, see how we use similar proportions in our mini pineapple cakes.
Why is the center still slightly jiggly?
This is normal for a set custard. The bars will firm up completely as they cool in the pan before you slice them.
Lemon Cookie Bars Recipe