Healthy Baked Pita Chips with Garlic and Paprika
- Time: 5 min active + 10 min baking
- Flavor/Texture Hook: Garlic spiced and mahogany crisp
- Perfect for: Quick fitness friendly snacks or party appetizers
That smell of toasted garlic and smoked paprika hitting the air is honestly the best part of this whole process. I remember making these for a movie night when I was trying to stick to a cleaner diet but still wanted something to crunch on.
Most store-bought versions taste like cardboard and oil, so I decided to just throw some pitas in the oven.
The result was a snack that actually feels light but hits that savory spot. You don't need a ton of ingredients to make these work, just a few pantry staples and a hot oven.
This recipe for Healthy Baked Pita Chips is a quick win for anyone who wants a high protein friendly side that doesn't take over your entire afternoon. It's fast, simple, and way better than anything in a foil bag.
Making Healthy Baked Pita Chips
What Actually Makes It Crispy
High Heat: 400°F evaporates surface moisture quickly, which locks in a firm crunch. Oil Coating: A thin layer of fat conducts heat evenly across the bread, creating those toasted brown edges.
| Method | Time | Texture | Best For |
|---|---|---|---|
| Oven Bake | 15 min | Uniform crunch | Large batches |
| Air Fryer | 8 min | Extra crisp | Single servings |
| store-bought | 0 min | Often greasy | Zero effort |
Why These Ingredients Work
| Ingredient | What It Does | Best Swap |
|---|---|---|
| Pita Bread | Provides the base | Whole wheat pita for more fiber |
| Olive Oil | Browns the bread | Avocado oil for higher smoke point |
| Garlic Powder | Adds savory depth | Onion powder |
| Smoked Paprika | Gives a woody aroma | Cumin for an earthier vibe |
Recipe Specs
Right then, let's look at the numbers. This recipe is designed for speed. Since we are using pre made pita, the "cooking" is really just a dehydration and browning process.
The prep takes about 5 minutes of slicing and tossing. The actual time in the oven is only 10 minutes, but you have to stay alert. These can go from golden to burnt in about 60 seconds if you aren't watching.
I usually make a full batch of 8 servings because they disappear fast. If you are eating these as a fitness snack, the fiber from the pita helps keep you full longer than potato chips would.
Gathering Your Essentials
You'll need a few basics. I prefer extra virgin olive oil for the flavor, but any neutral oil works. If you want a more rustic feel, go for whole wheat pitas. According to Serious Eats, the key to a good roast is ensuring the food isn't crowded on the pan.
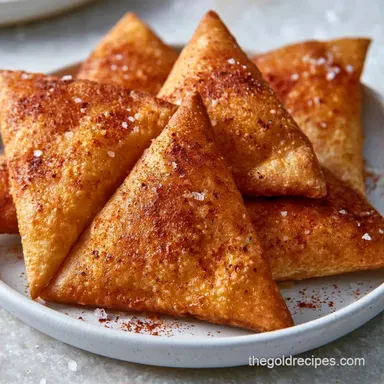
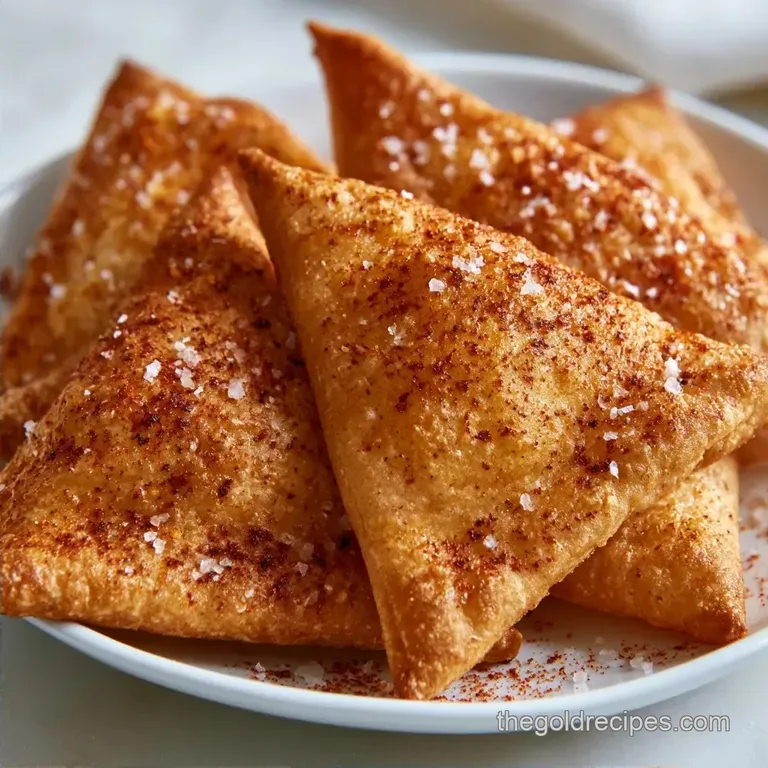
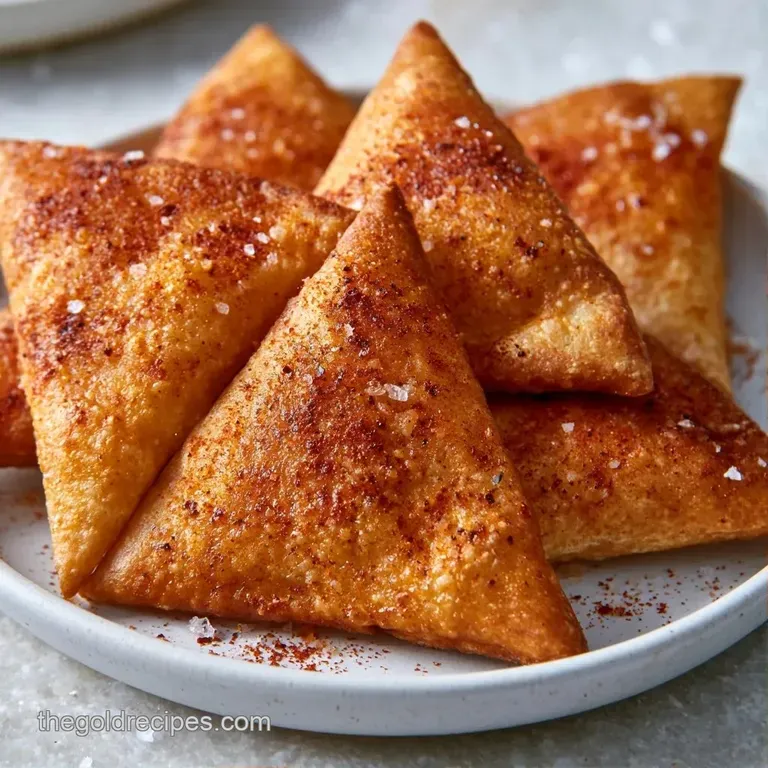
- 4 large pita breads (approx. 400g) Why this? Provides a sturdy, airy base for crunch.
- 3 tbsp extra virgin olive oil Why this? Helps the spices stick and browns the edges.
- 1/2 tsp fine sea salt Why this? Enhances the garlic and paprika notes.
- 1/2 tsp garlic powder Why this? Gives a pungent, savory punch.
- 1/4 tsp smoked paprika Why this? Adds a hint of smoke and a rich color.
Equipment Needed
Don't overthink the tools. A large bowl for tossing is a must so you don't break the pita triangles. A pizza cutter is my go to for the slicing part, as it's much faster than a chef's knife.
You'll also need a large baking sheet and some parchment paper. Trust me on the parchment - without it, the oil and salt can sometimes stick to the pan, making cleanup a pain.
How to Make It
- Preheat your oven to 400°F (200°C).
- Use a pizza cutter or knife to slice each pita bread into 8 equal triangles, ensuring pieces are uniform in size.
- Place the pita triangles into a large mixing bowl, drizzle with olive oil, and sprinkle with salt, garlic powder, and paprika. Toss gently until every piece is lightly glistening. Note: Be careful not to over mix or you'll break the triangles.
- Spread the seasoned pieces in a single layer on a parchment lined baking sheet.
- Bake for 7-10 minutes, flipping halfway through, until they turn mahogany colored and feel firm to the touch.
Chef's Note: I once burnt a whole tray because I got distracted by a podcast. Set a timer for 4 minutes and don't leave the kitchen!
Troubleshooting Texture Problems
| Issue | Solution |
|---|---|
| Why Your Chips Stay Chewy | This usually happens if the oven isn't hot enough or if the pieces are crowded. If they overlap on the pan, they steam instead of roast. Give them space to breathe. |
| Why Your Chips Burn | Pitas vary in thickness. Thinner breads brown faster. If you see the edges turning dark brown too quickly, pull them out immediately. |
| Why They Stick | This is almost always a parchment paper issue. Make sure the paper is flat and the oil is distributed evenly across the pieces. |
Customizing the Flavor
If you want to change things up, you can easily swap the spices. For a zesty kick, add a pinch of cayenne or check out my spicy pita chips for a more intense heat. If you prefer something simpler, just salt and pepper do the trick.
For those who want a more traditional approach, you can try these homemade pita chips which take slightly longer but have a different chew. You could also add dried oregano or thyme for a Mediterranean feel.
If you're feeling fancy, toss them in a bit of parmesan cheese during the last 2 minutes of baking. It creates a salty crust that's honestly hard to beat.
Adjusting the Batch Size
Scaling these healthy baked pita chips is pretty straightforward.
Cutting the recipe in half: Use 2 pitas and 1.5 tbsp of oil. You can use a smaller toaster oven tray, but keep the temperature at 400°F. The bake time remains roughly the same, though you should check them a minute early.
Doubling the recipe: Use 8 pitas. Don't just pile them on one tray or they'll stay soft. Work in batches. I recommend keeping the spices to 1.5x instead of a full 2x to avoid over salting.
Common Misconceptions
Baking takes too long compared to frying. Not really. By the time you heat up a pot of oil and clean it afterward, the oven version is already done.
Whole wheat pitas taste like cardboard. They actually have a nuttier, deeper flavor that pairs better with smoked paprika than white pitas do.
Storage and Waste
Store your healthy baked pita chips in an airtight container or a zip top bag. They stay crunchy for about 5 days at room temperature. If they lose their snap, just pop them back in the oven at 350°F for 2 minutes.
You can freeze them for up to 2 months, but they can occasionally pick up fridge smells if the bag isn't sealed tight.
To avoid waste, use any broken pita bits as "croutons" for a salad or toss them into a soup for a bit of crunch. If you have leftover olive oil in the bowl, use it to grease a pan for your next meal.
Serving Suggestions
These are a blank canvas. My favorite way to serve them is with a big bowl of classic hummus or a garlicky tzatziki. The acidity in a yogurt dip cuts through the richness of the olive oil perfectly.
You could also build a Mediterranean platter. Put the chips in the center and surround them with kalamata olives, feta cheese cubes, and sliced cucumbers. It's a great way to keep your snacking habits healthy while still feeling like you're eating a feast.
For a little something different, try pairing them with a spicy feta dip or even a simple avocado mash with lime and cilantro.
Recipe FAQs
Are baked pita chips healthy for you?
Yes, especially when homemade. You control the oil and sodium levels, avoiding the processed additives and preservatives found in store-bought versions.
What are the healthiest pita chips?
Homemade versions using olive oil. Baking them at 400°F instead of deep frying significantly reduces unhealthy saturated fats while maintaining a satisfying crunch.
Is pita bread low in histamine?
Generally, yes. Plain pita is typically considered low-histamine, though individuals with severe sensitivities should always verify the ingredients of their specific bread brand.
Are pitas good for diabetics?
In moderation, yes. While they are carbohydrates, pairing these chips with a protein or fiber rich dip helps slow glucose absorption and stabilize blood sugar levels.
What food can be made in advance for a party?
Baked pita chips are an ideal choice. They stay crunchy for up to 5 days when stored in an airtight container, making them perfect for early preparation.
What are the easiest appetizers to make for a party?
Pita chips paired with a savory dip. They require minimal effort and pair perfectly with a buffalo chicken dip for a quick, high protein crowd pleaser.
Why did my pita chips stay chewy instead of crunchy?
Give the pieces more space on the pan. If pita triangles overlap, they steam instead of roast, which prevents them from achieving a firm, crisp texture.
Healthy Baked Pita Chips