Ninja Creami Oreo Protein Ice Cream
- Time: Active 5 minutes, Passive 24 hours 5 mins, Total 24 hours 10 mins
- Flavor/Texture Hook: Silky vanilla base with a satisfying cookie shatter
- Perfect for: Post workout rewards, late night fitness cravings, or beginner meal prep
- The Science of Achieving Silky Oreo Protein Ice Cream
- Specific Recipe Specs for Your Fitness Goals
- Essential Components for a Cookies and Cream Masterpiece
- Tools Required for the Perfect Creamy Pint
- Step by Step Guide from Preparation to Plate
- Expert Solutions for Common Protein Pint Pitfalls
- Creative Flavor Variations to Keep Cravings at Bay
- Best Practices for Long Term Storage and Quality
- Elevating Your Serving Style for Maximum Enjoyment
- Recipe FAQs
- 📝 Recipe Card
The Science of Achieving Silky Oreo Protein Ice Cream
The moment you peel back the lid of a freshly spun pint, the aroma of sweet cream and cocoa hits you like a nostalgic trip to the mall food court. I remember my first attempt at a "healthy" version of this it was an icy, rock solid block of disappointment that smelled more like vitamins than dessert.
But after dozens of batches, I learned that the magic isn't just in the ingredients; it's in the way we manipulate the fat and air.
When you use ultra filtered milk and a whey casein blend, you're setting the stage for a much more stable emulsion. The smell of the vanilla extract blooming as it hits the cold milk is your first sign that this isn't going to be a "sad" protein dessert.
It's about bridging that gap between fitness goals and actual cravings. Trust me, once you hear that first cookie "snap" as you fold it into the velvety base, you'll never go back to those chalky pre made pints.
We're going for a texture that is dense yet smooth, something that doesn't just melt into a watery puddle. It's a game of chemistry, and we're winning. By the time you're done, you'll have a pint that feels indulgent but fits your macros like a glove.
Balancing the Freezing Point
Cryoprotectants: The sugar and salt in the base lower the freezing point, preventing the mix from becoming a solid ice cube. Without this, the machine would struggle to shave the layers smoothly.
Mastering Emulsification with Stabilizers
Gelling Agents: The starch in the sugar-free pudding mix acts as a stabilizer, binding the water and fat together. This prevents large ice crystals from forming, ensuring that "velvety" mouthfeel we're after.
Harnessing High Pressure Shearing
Micronization: Unlike traditional churning which incorporates air slowly, the high pressure blade shaves micro layers of the frozen base. This creates a denser, creamier structure similar to Italian gelato.
| Preparation Method | Total Time | Texture Outcome | Best For |
|---|---|---|---|
| Ninja Creami | 24 hours | Silky and dense | Maximum protein density |
| Blender/Food Processor | 10 mins | Soft serve/Icy | Immediate cravings |
| Hand Churned | 45 mins | Airy and light | Traditionalists |
If you're looking for another way to hit your goals while satisfying a sweet tooth, the Ninja Creami Protein recipe is a fantastic baseline to master before you start getting wild with mix ins.
Specific Recipe Specs for Your Fitness Goals
| Ingredient | Science Role | Pro Secret |
|---|---|---|
| Ultra filtered Milk | High protein/low sugar | Provides the creamy "fatty" mouthfeel without the extra calories |
| Whey Casein Blend | Structural Integrity | Casein thickens more than whey alone, preventing a runny texture |
| SF Pudding Mix | Emulsifier | Use vanilla or cheesecake flavor to enhance the Oreo profile |
| Sea Salt | Flavor Enhancer | A tiny pinch makes the chocolate in the Oreos pop |
The combination of the ultra filtered milk and the protein powder is non negotiable for that thick result. I once tried this with just almond milk and plain whey let's just say it looked more like a slushy than a scoop. If you find yourself wanting something even more decadent later on, you have to try my Chocolate Protein Ice Cream recipe which uses a similar technique for a fudgy finish.
Essential Components for a Cookies and Cream Masterpiece
- 1.5 cups ultra filtered milk (e.g., Fairlife): Why this? Higher protein and lower lactose leads to a much creamier freeze.
- Substitute: Whole milk (richer but higher sugar) or Soy milk (best plant based swap).
- 30g Vanilla or Cookies & Cream whey casein protein powder: Why this? Casein is the secret to a thick, scoopable consistency.
- Substitute: Pure Whey (will be slightly thinner; add 1/4 tsp xanthan gum).
- 8g sugar-free instant vanilla pudding mix: Why this? Acts as a binder to prevent the mix from turning powdery.
- Substitute: 1/2 tsp Guar Gum or Xanthan Gum.
- 5ml pure vanilla extract: Why this? Boosts the aromatic profile and masks any "protein" aftertaste.
- Substitute: Vanilla bean paste for those beautiful black flecks.
- 0.5g sea salt: Why this? Sharpens the contrast between the sweet base and the cocoa cookies.
- Substitute: Pink Himalayan salt.
- 22g standard Oreo cookies (approximately 2 cookies, crushed): Why this? Provides the iconic "crunch" and deep cocoa flavor.
- Substitute: Chocolate sandwich cookies or high protein cookie alternatives.
Chef's Tip: Grate a tiny bit of dark chocolate into the base before freezing. It deepens the "Oreo" aroma without significantly changing the macros.
Tools Required for the Perfect Creamy Pint
To get this right, you really need a high power centrifugal machine like the Ninja Creami. You'll also need a high speed whisk or a small handheld milk frother. I've found that using a frother ensures the pudding mix and protein powder are fully hydrated, which is the biggest hurdle to a smooth spin.
Don't forget a sturdy spoon for the mix in phase. You want something that can handle the thick, semi frozen base without bending. If you're a fan of high protein snacks that don't require 24 hours of waiting, you might also love making a Cottage Cheese Edible recipe for those moments when the "hangry" hits.
| Method | Temperature | Best For | Flavor Impact |
|---|---|---|---|
| Stovetop (Custard) | 170°F | Richness | Cooked egg flavor, very heavy |
| Ninja (No Cook) | 0°F | Convenience | Pure vanilla and protein forward |
| Oven (Baked Oreos) | 350°F | Texture | Toasts the cookies for a smoky cocoa scent |
step-by-step Guide from Preparation to Plate

- Whisk the liquids. Pour 1.5 cups ultra filtered milk into a large measuring jug. Note: Using the jug makes pouring into the pint container much cleaner.
- Incorporate the dry. Add 30g protein powder, 8g SF pudding mix, and 0.5g sea salt. Whisk until the scent of vanilla is strong and no dry clumps remain.
- Add aromatics. Stir in 5ml pure vanilla extract. Note: Adding this last keeps the aroma fresh.
- Transfer to pint. Pour the mixture into the official pint container, ensuring you don't exceed the "max fill" line.
- Freeze the base. Place the container on a level surface in the freezer for 24 hours. Freeze until the top is solid and matte.
- Prep the machine. Install the pint into the outer bowl and lock the lid. Note: Ensure the blade is clean and clicked into place.
- Initial Spin. Run the "Lite Ice Cream" cycle once. Listen for the high pitched whir to even out as the blade reaches the bottom.
- Check consistency. If it looks crumbly, add 1 tbsp of milk and run "Re spin". Look for a texture like soft serve.
- Create a well. Use a spoon to dig a 1 inch hole down the center of the pint.
- Add the crunch. Drop in 22g of crushed Oreos and run the "Mix in" cycle. Spin until the cookies are shattered into small, dark specs.
Expert Solutions for Common Protein Pint Pitfalls
Why Your Ice Cream Is Crumbly
If the pint looks like wet sand after the first spin, it's usually too cold. Most home freezers are set to a deep freeze, which can make the protein base more brittle than creamy. Don't panic; it just needs a little lubrication to help the blade do its job.
Taming the Freezer Hump
When liquid freezes, it expands. This often creates a "hump" in the middle of your pint that can stress the machine's motor. I always use a spoon to scrape the top flat before I start the spinning process. It saves the machine and ensures an even shave from top to bottom.
Fixing a Lack of Flavor
Sometimes, freezing "mutes" the sweetness. If the base tastes bland, it's usually because the salt was skipped. Salt doesn't make it salty; it acts as a volume knob for the vanilla and chocolate.
| Problem | Root Cause | Solution |
|---|---|---|
| Powdery Texture | Base is too cold (-5°F or lower) | Add 1 tbsp milk and Re spin |
| Too Much Air | Over whisking before freezing | Tap the pint on the counter to release bubbles |
| Cookies are Dust | Added during the main cycle | Use ONLY the "Mix in" button for Oreos |
Common Mistakes Checklist:
- ✓ Ensure the base is frozen for a full 24 hours (patience is the main ingredient).
- ✓ Never skip the pudding mix; it’s the "glue" that holds the texture together.
- ✓ Don't use standard milk if you want that specific 22g protein hit.
- ✓ Flatten the "freezer hump" before spinning to protect the blade.
- ✓ Always use the "Mix in" setting for Oreos so they stay as chunks, not powder.
Creative Flavor Variations to Keep Cravings at Bay
If you want to scale this down for a quick snack, you can halve the ingredients, but honestly, it’s hard to get the machine to spin a half pint correctly. It's better to make the full batch and just eat half. If you're scaling up for a party, work in batches.
Even if you have multiple pints, the machine needs a few minutes to rest between spins to prevent the motor from overheating.
Crafting a dairy-free Version
You can swap the milk for soy or cashew milk. Just be aware that the fat content is lower, so the final result might be slightly less "velvety" and more like a traditional ice milk. Adding 1/2 teaspoon of MCT oil can help bring back that fatty mouthfeel.
Intensifying the Chocolate Profile
If you're a true chocoholic, use a chocolate based protein powder and add 5g of dark cocoa powder to the base. This creates a "Double Oreo" effect that is incredibly rich.
- If you want it creamier: Add a tablespoon of heavy cream or Greek yogurt to the base.
- If you want it lower calorie: Swap the Oreos for chocolate cereal or sugar-free chocolate chips.
- If you want more texture: Don't crush the Oreos too much; leave them in larger halves.
Best Practices for Long Term Storage and Quality
Storing this Oreo Protein Ice Cream is a bit different than store-bought tubs. Because it lacks the heavy preservatives and high sugar content of commercial brands, it will freeze quite hard once it goes back into the freezer.
- Fridge: Don't store it here unless you plan on eating it within 20 minutes. It will melt into a thick soup.
- Freezer: It stays good for up to 2 weeks. If you have leftovers, flatten the top and freeze. When you're ready for more, you’ll likely need to "Re spin" it to get that texture back.
- Zero Waste Tip: If you have a tiny bit left that isn't worth a re spin, throw it into a blender with some cold coffee for a "Pro frap" morning treat.
Elevating Your Serving Style for Maximum Enjoyment
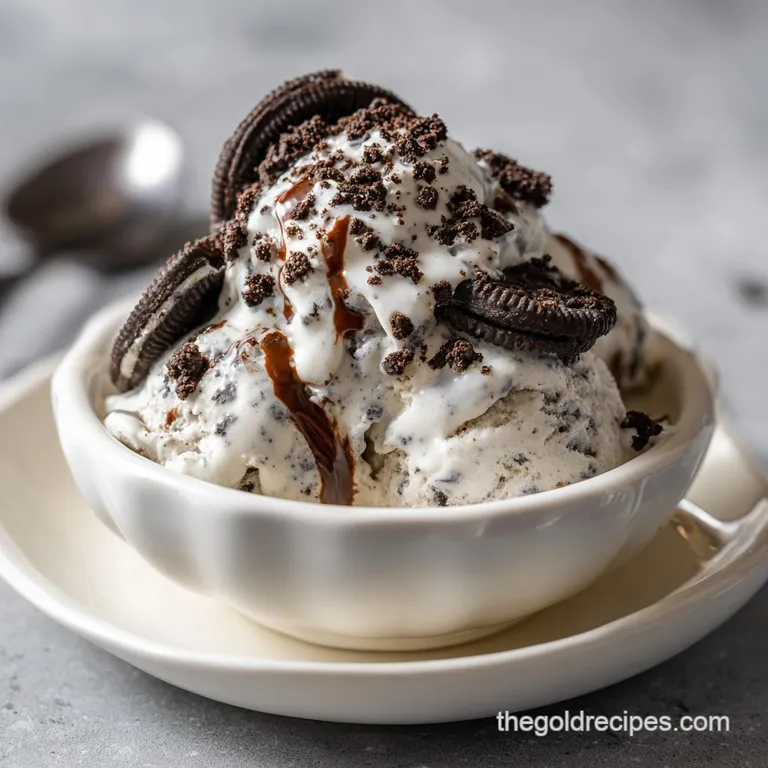
Presentation matters, even if you're eating this in your gym clothes. I love serving this in a chilled glass bowl with one extra whole Oreo tucked into the side. The contrast of the freezing cold cream and the slightly softened cookie bits is the ultimate reward after a long day.
- 1. Myth
- You can use any protein powder. Truth: Whey isolate on its own often yields a "dryer" result. A blend is always superior for texture.
- 2. Myth
- 24 hours is just a suggestion. Truth: If the core is still liquid, the blade will just splash the mix around rather than shaving it, resulting in a mess.
- 3. Myth
- It's exactly like Ben & Jerry's. Truth: It's a high protein alternative. While it's incredibly close, the "mouth coating" fat feel is lighter, which is why we use ultra filtered milk to compensate.
If you find yourself making this every night (like I do), keep a rotation of pints in the freezer. That way, you're never more than 5 minutes away from a 222 calorie win. Happy spinning!

Recipe FAQs
Can I use almond milk instead of ultra filtered milk?
No, this will compromise texture. Almond milk lacks the high protein and fat content needed to stabilize the freeze, resulting in a thinner, icier product.
How long must the base freeze before spinning in the machine?
Freeze for a full 24 hours. This extended time is critical to ensure the mixture is fully frozen solid, allowing the machine's blades to effectively shave the micro layers.
How to ensure the crushed Oreos remain crunchy chunks and not dust after mixing in?
Add cookies only during the dedicated "Mix in" cycle. Never run the cookies through the initial ice cream cycle, as the prolonged friction will pulverize them.
Is it true that skipping the sugar-free pudding mix makes the texture rock hard?
Yes, this is common. The pudding mix acts as a binder and emulsifier; without it, the low sugar base tends to freeze into large, unmanageable ice crystals.
What is the best way to soften the pint quickly if it freezes too solid?
Let it sit on the counter for 10 minutes or add 1 tablespoon of milk and run "Re spin". If you mastered the low temperature control needed here, you'll find this simple addition restores the soft serve quality easily.
Can I substitute the Oreo cookies with pieces from a store-bought soft cookie?
No, avoid soft baked additions immediately. Soft cookies add moisture that can bleed into the base and cause textural issues during the spin process.
How do I maximize the vanilla flavor to mask any protein aftertaste?
Use high-quality pure vanilla extract and a pinch of sea salt. The salt sharpens the sweet and aromatic notes, balancing the flavor profile beautifully, similar to how acid balances sweetness in the Crumbl Sugar Cookie recipe.
Oreo Protein Ice Cream
Ingredients:
Instructions:
Nutrition Facts:
| Calories | 222 kcal |
|---|---|
| Protein | 22.2 g |
| Fat | 6.7 g |
| Carbs | 17.4 g |
| Fiber | 0.8 g |
| Sugar | 9.2 g |
| Sodium | 245 mg |
