Chicken Piccata: Velvety Sauce Hack
- Time: Active 10 minutes, Passive 10 minutes, Total 20 minutes
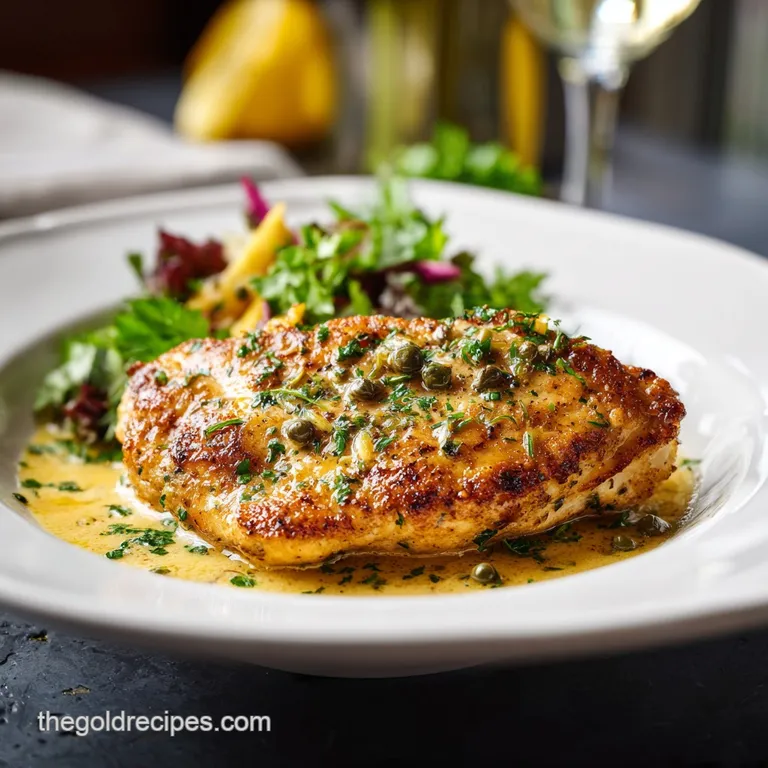
- Flavor/Texture Hook: Shatteringly crisp exterior with a tangy, velvety emulsion
- Perfect for: High performance weeknight dinners or showing off technical skills to friends
- Essential Technical Specs for Success
- Analyzing the Core Flavor Components
- Required Tools for Thermal Control
- Executing the over High heat Sear Sequence
- Diagnostic Guide to Common Errors
- Modular Variations and Substitutions
- Long-Term Storage and Thermal Recovery
- Optimizing the Final Presentation
- Recipe FAQs
- 📝 Recipe Card
Essential Technical Specs for Success
The Physics of the Emulsion: Cold fat molecules bond with hot acid when whisked vigorously, creating a stable, velvety suspension. This prevents the sauce from separating into an oily mess during the final glaze.
- Maillard Management: Patting the protein bone dry allows the flour to bond instantly, preventing a gummy barrier.
- Acid Base Balance: The caper brine and lemon juice act as surfactants, helping the butter and broth unite into a cohesive sauce.
- Starch Gelatinization: The light dusting of flour absorbs the chicken's natural juices, creating a microscopic "velvet" layer.
- Thermal Stability: Using cold butter at the very end prevents the milk solids from separating too quickly in the over high heat pan.
| Thickness | Internal Temp | Rest Time | Visual Cue |
|---|---|---|---|
| 1/4 inch | 165°F | 2 mins | Opaque and firm |
| 1/2 inch | 165°F | 3 mins | Golden crust formed |
| 3/4 inch | 165°F | 5 mins | Resilient to touch |
Achieving the right internal temperature is non negotiable for safety, but the texture is where the real chemistry happens. If you slice into the meat too soon, the restructured protein fibers will dump their moisture, leaving you with a dry bite and a watery plate.
Analyzing the Core Flavor Components
We need to look at our ingredients as chemical tools rather than just food. The flour isn't just a coating; it’s a thickening agent for the sauce that will eventually develop in the pan. The white wine isn't just for flavor; it’s a solvent that releases the "fond" (those brown bits stuck to the pan) which contains concentrated umami. If you're interested in other high intensity protein textures, you might want to see how we handle the crunch in this Fried Chicken Livers recipe.
| Component | Science Role | Pro Secret |
|---|---|---|
| Flour (AP) | Surface dehydration | Wondra flour adds more crunch |
| White Wine | Deglazing solvent | High acid Sauvignon Blanc is best |
| Cold Butter | Emulsification agent | Freeze for 10 mins before adding |
| Capers | Brine injection | Rinse to control sodium levels |
The interaction between the dry dredge and the oil creates the initial "shatter" effect. Without enough heat, the flour simply absorbs the oil and turns into a paste. We want the oil to be shimmering almost at its smoke point to ensure the starch fries rather than soaks.
Required Tools for Thermal Control
To execute this Chicken Piccata recipe, you need a pan with high thermal mass. Stainless steel is the gold standard here because it encourages the formation of the fond.
Non stick pans are the enemy of a good piccata because the chicken won't stick slightly, meaning you lose out on the chemical browning that flavors the sauce. A heavy 12 inch skillet (like a Lodge cast iron or an All Clad stainless) is your best bet for even heat distribution.
You will also need a meat mallet. The "hacker" way to do this is to use the bottom of a heavy saucepan if you don't own a mallet, but the goal is uniform thickness. Uniformity equals simultaneous doneness.
If one side is thicker than the other, you’ll overcook the thin edge while waiting for the center to hit that 165°F mark.
Executing the over High heat Sear Sequence

- Prep and Pound. Place the 2 large chicken breasts between plastic wrap. Note: This prevents the fibers from tearing during flattening.
- Achieve Uniformity. Pound the chicken to a 1/4 inch thickness until even across the entire surface.
- Season Heavily. Mix 1/2 cup flour with 1 tsp salt and 1/2 tsp pepper. Note: Season the flour, not just the meat, for better distribution.
- The Dry Dredge. Coat the chicken in the flour mixture, shaking off every bit of excess until only a translucent veil remains.
- Thermal Prep. Heat 2 tbsp olive oil in the skillet until it shimmers and wisps of smoke appear.
- The Initial Sear. Lay the chicken away from you in the pan. Note: This prevents hot oil splatter from hitting your skin.
- Monitor Browning. Cook for 3 minutes per side until a deep golden brown crust develops.
- The Deglaze. Remove chicken, then pour in 1/3 cup white wine. Note: Scrape the bottom vigorously to release the flavor molecules.
- Liquid Reduction. Add 1/2 cup broth and 3 tbsp lemon juice. Simmer until the liquid reduces by half and thickens slightly.
- The Cold Emulsion. Drop in 2 tbsp capers and 1 tbsp cold butter. Whisk until the sauce becomes glossy and opaque.
- Final Glaze. Return chicken to the pan for 1 minute until the sauce clings to the crust.
- Garnish Finish. Sprinkle with 2 tbsp fresh parsley. Note: Heat destroys the volatile oils in parsley, so add it last.
Chef's Note: If your sauce looks transparent or oily, your emulsion has failed. Remove from heat immediately, add a teaspoon of water, and whisk in another small knob of ice cold butter to bring it back together.
Diagnostic Guide to Common Errors
The most frequent error in an easy chicken piccata is the "soggy bottom." This happens when the chicken sits in the sauce for too long or if the pan wasn't hot enough during the initial sear.
If the flour doesn't cook instantly, it creates a sponge like layer that pulls in moisture instead of repelling it. Another technical pitfall is using a wine that is too sweet, which caramelizes incorrectly and throws off the acid balance.
Preventing Bitter Sauce Profile
Bitterness usually comes from two sources: burnt garlic (if you added any) or the white pith of the lemon. When juicing your 3 tablespoons of lemon juice, ensure no seeds or pith chunks fall in. Also, if you use a stainless steel pan, don't let the fond turn black. It should be the color of a toasted almond.
If it goes darker, wipe the pan and start the sauce over, or you'll ruin the entire best chicken piccata recipe.
| Problem | Root Cause | Solution |
|---|---|---|
| Flour falling off | Meat was too wet | Pat dry with paper towels |
| Oily sauce | Butter added too fast | Whisk in cold butter slowly |
| Tough chicken | Overcooking | Pull at 160°F (carryover to 165°F) |
Washing your capers is another vital step. The brine they sit in is essentially a concentrated salt solution that can easily overwhelm the delicate lemon notes. A quick 10 second rinse under cold water removes the excess salt while keeping the floral, briny heart of the caper intact.
Common Mistakes Checklist: ✓ Skipping the "shake" after dredging (excess flour makes a pasty sauce) ✓ Using "cooking wine" (the high salt content ruins the chemical balance) ✓ Overcrowding the pan (lowers temperature and steams the meat) ✓ Forgetting to whisk during the
butter addition (prevents emulsion) ✓ Using room temperature butter (it will melt into oil rather than emulsify)
Modular Variations and Substitutions
While the lemon chicken piccata is the gold standard, you can modify the protein or the acid base. If you want a more decadent, Mediterranean style meal, you might enjoy the profile of this Creamy Tuscan Chicken recipe. For those who can't do wine, a mixture of extra chicken broth and a teaspoon of white wine vinegar provides the necessary acidity to deglaze the pan effectively.
gluten-free Transformation
To make this gluten-free, substitute the all purpose flour for a high starch alternative like cornstarch or potato starch. These actually produce a crispier, "glass like" crust that stays crunchy longer than wheat flour.
However, be careful with the sauce thickening; starch based dredges thicken the sauce much faster than flour, so you may need to add an extra splash of broth to maintain the right consistency.
| Original Ingredient | Substitute | Why It Works |
|---|---|---|
| All purpose flour | Cornstarch | Creates a thinner, crispier "shatter" crust |
| White Wine | Verjus | Provides acidity without the alcohol content |
| Chicken Broth | Vegetable Broth | Lighter flavor profile; less umami depth |
| Butter | Ghee | Higher smoke point but won't emulsify as well |
When scaling this recipe up for a crowd, do not simply double the liquid. If you are making 8 servings, use 1.5x the wine and broth. Too much liquid prevents the reduction from happening quickly, which means your chicken will sit in the pan getting soggy while you wait for the sauce to thicken.
Work in batches to maintain the pan's thermal energy.
Long Term Storage and Thermal Recovery
Chicken piccata with capers is technically best eaten immediately because the emulsion is most stable right after it's formed. However, you can store leftovers in the fridge for up to 3 days.
The crust will lose its crunch as it absorbs the sauce, but the flavor will actually deepen as the lemon and capers infuse into the meat.
To reheat, avoid the microwave at all costs it will turn the chicken into rubber and break the sauce into an oily puddle. Instead, place the chicken in a cold skillet with a tablespoon of water or broth. Cover it and heat over medium low.
This creates a steam room effect that gently thaws the fats without shocking the protein.
For zero waste, save your lemon rinds! You can toss them into a jar of white vinegar for a natural kitchen cleaner, or zest them before juicing and freeze the zest for future baking projects. Even the leftover flour dredge (if it hasn't touched raw meat) can be used to thicken a soup later in the week.
Optimizing the Final Presentation
Presentation is about contrast. The chicken piccata sauce recipe is naturally pale and glossy, so you need vibrant greens to make it pop. Serve this over a bed of angel hair pasta or alongside roasted asparagus.
The pasta is a strategic choice; the starch on the noodles helps grab the emulsion, ensuring every bite is coated in that lemony, buttery goodness.
Right before serving, hit the plate with a final crack of fresh black pepper. The volatile aromatics in the pepper provide a spicy bridge between the heavy butter and the sharp lemon juice.
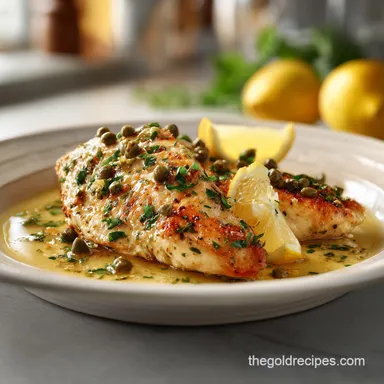
If you’re feeling bold, a few lemon slices charred in the pan for 30 seconds add a smoky, caramelized visual that makes the dish look like it came from a high end bistro.
Let's crack on with this. Once you've mastered the sear and the whisk, this will become your go to "I have 20 minutes" meal that tastes like you spent hours decoding the flavors. It’s brilliant, it’s fast, and it’s pure kitchen chemistry.

Recipe FAQs
What is chicken piccata made of?
Chicken, flour, lemon juice, white wine, butter, and capers form the core components. The chicken is lightly dredged and pan-fried, then finished in a glossy sauce created by deglazing the pan and creating an emulsion with cold butter and lemon. It's a masterclass in balancing acid and fat.
What does piccata mean?
Piccata simply means "pounded" or "flattened." In culinary terms, it refers to a preparation where thin slices of meat are lightly dredged in flour, quickly sautéed, and served in a simple sauce typically featuring lemon and butter. If you master the pounding technique here, you'll find consistent results across other thin cut recipes like our Tender Fried Chicken recipe.
What do you eat with chicken piccata?
Pasta, rice, or steamed green vegetables are ideal. Because the sauce is rich and tangy, it needs a plain starch base to absorb it, like angel hair pasta or creamy polenta. Roasted asparagus or lightly sautéed spinach make excellent counterpoints to the richness.
What is the difference between scallopini and piccata?
Scallopini is the cut; Piccata is the preparation style. Scallopini refers to thinly sliced meat, which is often pounded thin. Piccata refers specifically to that thin meat being dredged, sautéed, and served in a lemon caper butter sauce. If you enjoyed the pan-searing aspect of this preparation, you should explore the high heat searing required for our Beef and Broccoli recipe.
How do I prevent the piccata sauce from becoming oily or breaking?
Whisk in cold butter off the heat at the very end. This technique is key to stable emulsification; the cold fat molecules bond with the hot acid (lemon juice/wine) when vigorously whisked, creating a cohesive, glossy sauce.
If the heat is too high or the butter is warm, the emulsion will fail and separate.
Is it true that I must use chicken breast for piccata?
No, you can use chicken thighs, but breast is traditional for uniformity. Chicken breast pounded thin cooks quickly and evenly, which is crucial for this dish's fast cooking time.
Thighs have more fat and connective tissue, requiring slightly longer cooking times which might scorch your delicate sauce base.
Why does my flour coating keep falling off the chicken?
The chicken surface was likely too wet before dredging. You must pat the cutlets completely dry with paper towels before lightly coating them in the seasoned flour. Excess moisture prevents the flour from adhering properly, leading to a gummy layer that detaches during the sear.
Easy Chicken Piccata Recipe
Ingredients:
Instructions:
Nutrition Facts:
| Calories | 338 kcal |
|---|---|
| Protein | 36.4 g |
| Fat | 13.8 g |
| Carbs | 11.2 g |
| Fiber | 0.7 g |
| Sugar | 0.5 g |
| Sodium | 795 mg |
