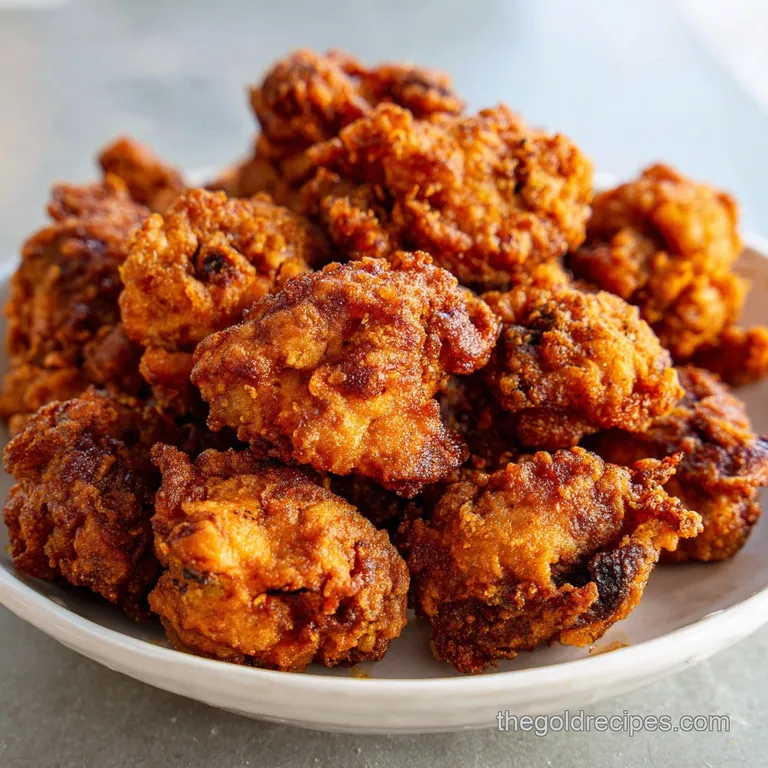
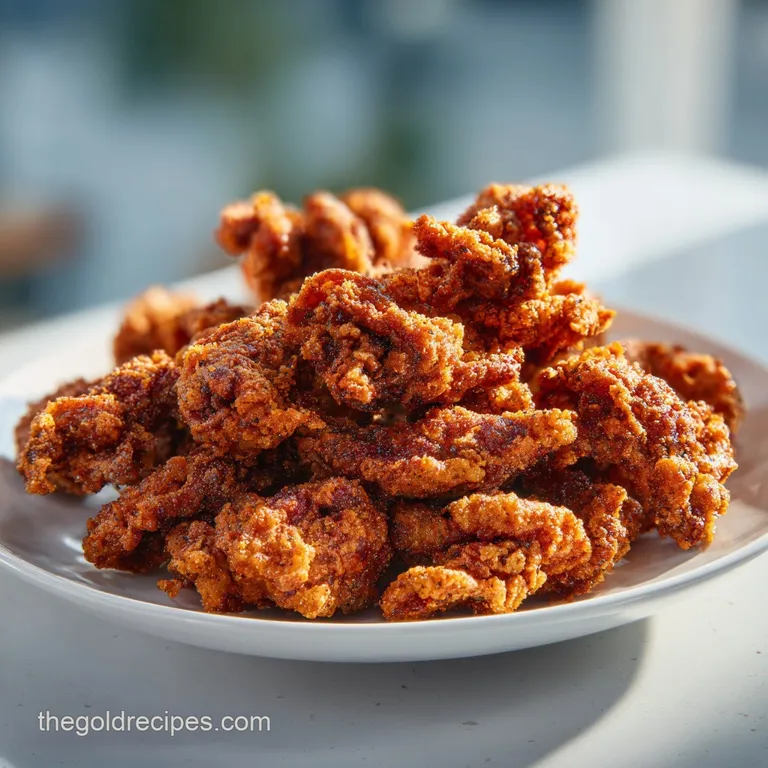
Tender Fried Chicken Gizzards Recipe
- Time: Active 15 mins, Passive 30 mins, Total 45 mins
- Flavor/Texture Hook: Shatter crisp exterior with a savory, tender center
- Perfect for: Family game nights or a budget conscious weekend treat
- The Secrets Behind This chicken gizzards recipe fried
- The Secret to Tender Crispy Bites
- Quick Yield and Timing Overview
- Essential Pantry Staples for Crunch
- Kitchen Tools for Perfect Frying
- Simple Steps to Golden Perfection
- Solving Common Texture Issues
- Smart Variations for Every Kitchen
- Maintaining Shatter Crisp Crust
- Ideal Pairings for Hearty Meals
- Debunking Kitchen Rumors
- High in Sodium
- Recipe FAQs
- 📝 Recipe Card
The Secrets Behind This chicken gizzards recipe fried
The kitchen starts to hum the moment that quart of peanut oil begins to shimmer in the heavy cast iron skillet. It is a specific sound, isn't it? That low, rhythmic popping that tells you the heat is just right.
I remember standing in my grandmother's kitchen, watching her clean a pile of gizzards with the precision of a jeweler, tossing the silver skin aside while the big pot of chicken stock bubbled on the back burner. That aroma of bay leaf and simmering meat is the ultimate signal that something hearty is on the way.
Most folks avoid making these at home because they've had the "rubber band" version at a gas station or a poorly managed buffet. You know the ones you chew for three minutes just to swallow one bite. I made that mistake exactly once when I was twenty, thinking I could just toss them in flour and fry them raw.
Trust me, your jaw will never forgive you. This recipe changes that entire narrative by using a two stage process that treats this tough muscle with the respect it deserves.
We are going to take 1 lb chicken gizzards and turn them into something that rivals the best fried chicken you have ever had. It is about the contrast. The buttermilk soak provides a velvety tang that cuts through the rich, deep fried coating, while the cornstarch in the dredge ensures every bite has a distinct, audible shatter.
This is not just a snack; it is a lesson in how to turn a humble, budget friendly cut into a family favorite that everyone will be fighting over.
The Secret to Tender Crispy Bites
The Pre Simmer Soften: Boiling the gizzards in chicken stock for 30 minutes breaks down the tough connective tissue before they ever hit the oil.
The Acid Bath: Lactic acid in the whole buttermilk further tenderizes the muscle fibers, ensuring the final result is easy to bite through.
The Starch Shield: Using 0.5 cup cornstarch creates a moisture resistant barrier that stays crispy far longer than flour alone.
The Hot Sauce Bind: Adding vinegar based hot sauce to the egg wash doesn't just add heat; it helps the breading grip the meat so it doesn't slide off.
| Thickness | Internal Temp | Rest Time | Visual Cue |
|---|---|---|---|
| 1.5 cm | 165°F (74°C) | 3 mins | Coating is deep mahogany brown |
| 2 cm | 165°F (74°C) | 4 mins | Oil bubbles around gizzard slow down |
| 2.5 cm | 165°F (74°C) | 5 mins | Bubbles become very fine and wispy |
When you are working with smaller cuts like these, the visual cues are actually more important than the thermometer. Since we pre cook the meat in the stock, the frying stage is really all about the crust. You want to see that oil bubbling vigorously at first, then tapering off.
That change in bubbling tells you the moisture has left the crust, leaving behind nothing but crunch.
Quick Yield and Timing Overview
| Ingredient | Role | Pro Secret |
|---|---|---|
| 1 lb Chicken Gizzards | Main Muscle | Clean every bit of yellow membrane for the best texture. |
| 1 cup Whole Buttermilk | Tenderizer | Shake the carton well to ensure the fats are fully emulsified. |
| 0.5 cup Cornstarch | Crunch Agent | Mix thoroughly with the flour to prevent "patchy" breading. |
| 1 quart Peanut Oil | Cooking Medium | Peanut oil has a high smoke point and adds a faint, nutty richness. |
While you can use vegetable oil, peanut oil is the gold standard for Southern frying. It handles the 180°C (350°F) heat without breaking down or smoking out your kitchen. If you are looking for more budget friendly ideas for these types of cuts, you might also enjoy my Fried Chicken Livers recipe which uses a very similar dredging technique.
Essential Pantry Staples for Crunch
For this chicken gizzards recipe fried, we keep things simple but high-quality. You will need 1 lb chicken gizzards, cleaned and trimmed of any silver skin. For the simmering liquid, grab 2 cups chicken stock, 1 tsp salt, and 1 bay leaf.
The wet wash consists of 1 cup whole buttermilk, 1 tbsp hot sauce, and 1 large egg. For that legendary crust, combine 1.5 cups all purpose flour, 0.5 cup cornstarch, 1 tbsp garlic powder, 1 tbsp smoked paprika, 1 tsp cayenne pepper, 2 tsp black pepper, and 1 tsp kosher salt.
Finally, have 1 quart peanut oil ready for the deep fry.
| Original Ingredient | Substitute | Why It Works |
|---|---|---|
| Whole Buttermilk (1 cup) | Plain Yogurt + Milk (0.5 cup each) | Provides similar acidity and thickness to help the flour stick. |
| Peanut Oil (1 quart) | Vegetable Oil (1 quart) | High smoke point, though it lacks the subtle nutty flavor profile. |
| All Purpose Flour | Cup for-Cup GF Flour | Works well for frying, though the crust may brown slightly faster. |
Using the right flour is non negotiable here. AP flour provides the structure, while the cornstarch provides the crispness. If you use only cornstarch, the breading becomes too brittle and shatters into dust. If you use only flour, it can turn doughy or soft if the gizzards sit for more than five minutes.
The 3:1 ratio of flour to cornstarch is the sweet spot for a crust that stays firm even as it cools.
Kitchen Tools for Perfect Frying
You don't need a fancy deep fryer to make this work. In fact, a heavy cast iron skillet or a Dutch oven is much better. These heavy bottomed pans hold onto heat. When you drop cold, battered gizzards into the oil, the temperature naturally dips.
Cast iron recovers that heat much faster than a thin stainless steel pot would. This prevents the breading from soaking up excess oil and becoming greasy.
A spider strainer or a slotted metal spoon is another essential. You want to be able to lift the gizzards out and let the oil drain back into the pot immediately. I also highly recommend using a digital clip on thermometer.
Keeping that oil at a steady 180°C (350°F) is the difference between a golden brown masterpiece and a dark, burnt mess. If the oil gets too hot, the spices in the flour (especially the paprika) will burn and turn bitter before the meat is heated through.
Simple Steps to Golden Perfection
1. The Rapid Tenderizing Process
Place your 1 lb chicken gizzards in a medium pot with 2 cups chicken stock, 1 tsp salt, and 1 bay leaf. Bring to a boil, then reduce heat and simmer for 30 minutes until the meat is easily pierced with a fork.
Note: This step is the "insurance policy" against tough, chewy results.
2. The Cooling Phase
Drain the gizzards and discard the bay leaf. Let them sit on a paper towel for 5 minutes until the steam stops rising. Note: Removing excess surface moisture now helps the buttermilk stick better later.
3. The Buttermilk Soak
In a shallow bowl, whisk together 1 cup whole buttermilk, 1 tbsp hot sauce, and 1 large egg. Add the cooled gizzards to this mixture, ensuring every piece is fully submerged. Let them sit for at least 10 minutes.
4. The Seasoned Dredge
In a large gallon sized bag or a wide bowl, whisk 1.5 cups all purpose flour, 0.5 cup cornstarch, and all the spices (garlic powder, paprika, cayenne, peppers, and salt). Note: Using a bag makes the coating process much faster and less messy.
5. The First Coating
Lift the gizzards from the buttermilk, letting the excess drip off, and drop them into the flour mixture. Shake vigorously until every nook and cranny is covered in white powder.
6. The Heat Prep
While the gizzards rest in the flour, heat 1 quart peanut oil in a heavy skillet to 180°C (350°F). Note: Let the breaded gizzards sit for 2-3 minutes to allow the flour to hydrate, which prevents the coating from falling off.
7. The Golden Fry
Carefully drop the gizzards into the hot oil in batches. Fry for 3-5 minutes until they turn a deep, golden mahogany brown. Do not overcrowd the pan, or the temperature will plummet.
8. The Final Drain
Use a spider strainer to move the gizzards to a wire rack set over a baking sheet. Note: Resting on a rack instead of paper towels keeps the bottom from getting soggy.
9. The Seasoning Finish
Immediately sprinkle with a tiny pinch of extra kosher salt while the oil is still wet on the surface. Serve while the sizzle is still audible.
Solving Common Texture Issues
Why Your Crust Is Falling Off
This usually happens because the gizzards were too wet when they went into the buttermilk, or they didn't rest long enough after dredging. That 2 minute rest period after the flour coating is vital. It allows the buttermilk and flour to form a sort of "paste" that glues itself to the meat.
If you skip this, the steam from the meat will push the breading away as soon as it hits the oil, causing it to flake off in big sheets.
Dealing With Tough Centers
If the meat is still rubbery, it simply didn't simmer long enough. Some gizzards are tougher than others depending on the age of the bird. If 30 minutes didn't do it, don't be afraid to go for 45.
You want them "tender crisp" soft enough to bite through with ease, but still holding their shape so they don't turn into mush in the fryer.
| Problem | Root Cause | Solution |
|---|---|---|
| Breading is soggy | Oil temperature was too low | Ensure oil reaches 180°C (350°F) before adding meat. |
| Dark/Burnt exterior | Too much sugar in buttermilk or high heat | Lower heat to 170°C and avoid adding sugar to the marinade. |
| Floury taste | Gizzards didn't fry long enough | Increase fry time by 60 seconds until the "raw flour" smell vanishes. |
Common Mistakes Checklist
- ✓ Never skip the pre simmer step; raw gizzards stay tough no matter how long you fry them.
- ✓ Pat the gizzards dry after simmering to ensure the wet wash actually bonds to the surface.
- ✓ Use a thermometer to maintain a steady 180°C (350°F); temperature swings lead to greasy food.
- ✓ Don't use a paper towel for draining; a wire rack allows air to circulate, keeping the crust crisp.
- ✓ Clean the gizzards thoroughly; any remaining yellow inner lining is bitter and very tough.
Smart Variations for Every Kitchen
If you want to scale this recipe up for a big family reunion, you can easily double or triple the ingredients. When scaling up, keep in mind that you don't need to triple the oil just work in more batches.
For the spices, I usually only increase them by 1.5x rather than a full 2x to avoid the salt becoming overpowering. If you are cooking for just two people, half the recipe works perfectly, but still use the full egg in the wet wash for the best binding properties.
For a flavor twist, try adding 1 tbsp of lemon pepper seasoning to the flour for a "Zesty Fried" version. It cuts through the richness beautifully. If you're a fan of heartier meals that use every part of the bird, you might also want to look at my Chicken Livers With recipe, which is a fantastic way to serve these types of meats over a bed of creamy mashed potatoes or rice.
| Goal | Method | Adjustment | Result |
|---|---|---|---|
| Extra Spicy | Double the Cayenne | Add 1 tsp extra cayenne + 1 tbsp hot sauce | Intense, lingering heat |
| Lighter Crust | Single Dredge | Skip the buttermilk soak, use milk only | Thinner, cracker like coating |
| Garlic Heavy | Fresh Garlic Oil | Infuse oil with 3 cloves before frying | Deep, aromatic garlic finish |
Maintaining Shatter Crisp Crust
Fried food is always best fresh, but you can keep leftovers in the fridge for up to 3 days. The trick is how you handle them. Never, ever use the microwave. The microwave will turn that beautiful crust into a sad, soggy sponge.
Instead, use a toaster oven or your main oven at 200°C (400°F) for about 5 to 7 minutes. Place them on a wire rack so the hot air can circulate around the entire gizzard, crisping up the bottom.
For long term storage, you can freeze the fried gizzards for up to 2 months. Freeze them in a single layer on a baking sheet first, then transfer them to a freezer bag. This prevents them from sticking together.
When you're ready for a snack, you can bake them directly from frozen at 200°C (400°F) for 12-15 minutes. They won't be quite as "shatter crisp" as the day they were made, but they'll be much better than anything from the frozen aisle.
For zero waste, save that chicken stock you used for simmering! After you've cooked the gizzards, the stock is full of extra flavor. Strain it and use it as a base for a hearty gravy to serve alongside the gizzards, or use it to cook a pot of rice.
Even the discarded silver skin and trimmings can be boiled down with onion peels and carrot tops to make a basic bone broth for future recipes.
Ideal Pairings for Hearty Meals
These crispy bites are practically screaming for a dipping sauce. A classic honey mustard or a spicy remoulade works wonders. The sweetness of the honey or the tang of the remoulade balances the salty, savory notes of the smoked paprika and garlic. I also love serving these with a side of cold, creamy coleslaw.
The temperature contrast between the hot gizzards and the cold cabbage is a sensory delight.
If you are looking to make this a full, "stick to your ribs" dinner, pair it with something like my Unstuffed Cabbage Rolls recipe. It provides a nice vegetable heavy balance to the deep fried gizzards. Other great sides include buttered corn on the cob, mashed potatoes with a dark brown gravy, or even just a big basket of hushpuppies. The goal is comfort, so don't be afraid to lean into those classic Southern side dishes.
Debunking Kitchen Rumors
One of the biggest myths is that gizzards are "unhealthy" or "dirty" meat. In reality, they are a very lean, dense muscle. As long as you clean them properly, removing the inner yellow lining, they are as clean as any chicken breast. Another common misconception is that you have to soak them in milk overnight.
While a long soak doesn't hurt, the 30 minute simmer we do in this recipe is far more effective at tenderizing the meat than any overnight marinade could ever be.
Finally, some people think you can't get a good fry without a dedicated deep fryer. That's just not true. A heavy pot and a steady hand are all you need. In fact, many professional chefs prefer a cast iron skillet because the shallow depth allows for better steam escape, which leads to a crispier final product.
Don't let the lack of "special" equipment stop you from enjoying this budget friendly family classic. It is all about the technique, not the gadgets.

High in Sodium
965 mg mg of sodium per serving (42% of daily value)
The American Heart Association recommends limiting sodium intake to about 2,300mg per day for overall cardiovascular health.
Sodium Reduction Tips for Fried Chicken Gizzards:
-
Low Sodium Broth-30%
Swap regular chicken stock for a low-sodium or no-salt added version. This can significantly reduce the overall sodium content of the dish.
-
Reduce Added Salt-25%
Decrease the amount of added salt, especially the 1 tsp added to the gizzards when boiling and the 1 tsp of kosher salt added to the flour mixture. Try using only ½ tsp in each step to start.
-
Control Hot Sauce-15%
Use a lower sodium hot sauce or reduce the amount of hot sauce added to the buttermilk. Experiment with half the amount and add more to taste after cooking.
-
Flavor Boost
Enhance the flavor with sodium free herbs and spices! Consider adding onion powder, white pepper, dried thyme, or oregano to the flour mixture to compensate for reduced salt.
Recipe FAQs
What is the best way to tenderize gizzards?
Simmer them first in seasoned liquid. Boil the cleaned gizzards in chicken stock with aromatics like bay leaf for 30 minutes until fork tender, followed by a quick soak in buttermilk.
What to season chicken gizzards with?
Use a mix of savory spices with high flavor impact. A good blend includes garlic powder, smoked paprika, cayenne pepper, black pepper, and kosher salt mixed into your flour dredge.
What is the best way to fry gizzards?
Use a two-stage process: pre-simmer, then deep fry. After simmering, dredge the gizzards in a flour/cornstarch mix and fry in oil held steadily at 180°C (350°F) until deep golden brown.
How long should I simmer gizzards to ensure tenderness?
Simmer for 30 minutes, adjusting based on texture. This step is crucial for breaking down the tough muscle tissue; if they are still chewy after 30 minutes, continue cooking until easily pierced by a fork.
Can I bake gizzards instead of frying them for a healthier result?
Yes, but you must bake them on a rack at high heat. To mimic the crispness, bake them at 200°C (400°F) on a wire rack so air circulates, similar to how we handle reheating leftovers in the oven.
Who should not eat chicken gizzard?
Individuals with specific dietary restrictions should exercise caution. Gizzards are high in purines and cholesterol, so those managing gout or severe cardiovascular conditions should consume them sparingly.
How do I keep the breading from falling off during frying?
Ensure the meat rests in the dry dredge for 2-3 minutes before frying. This rest period allows the flour and buttermilk to hydrate and glue the coating securely to the meat surface; mastering this adhesion is key, similar to getting a perfect crust on roasted vegetables like in our Garlic Parmesan Roasted recipe.
Tender Fried Chicken Gizzards

Ingredients:
Instructions:
Nutrition Facts:
| Calories | 378 kcal |
|---|---|
| Protein | 22.8 g |
| Fat | 18.4 g |
| Carbs | 31.2 g |
| Fiber | 1.8 g |
| Sugar | 1.2 g |
| Sodium | 965 mg |
