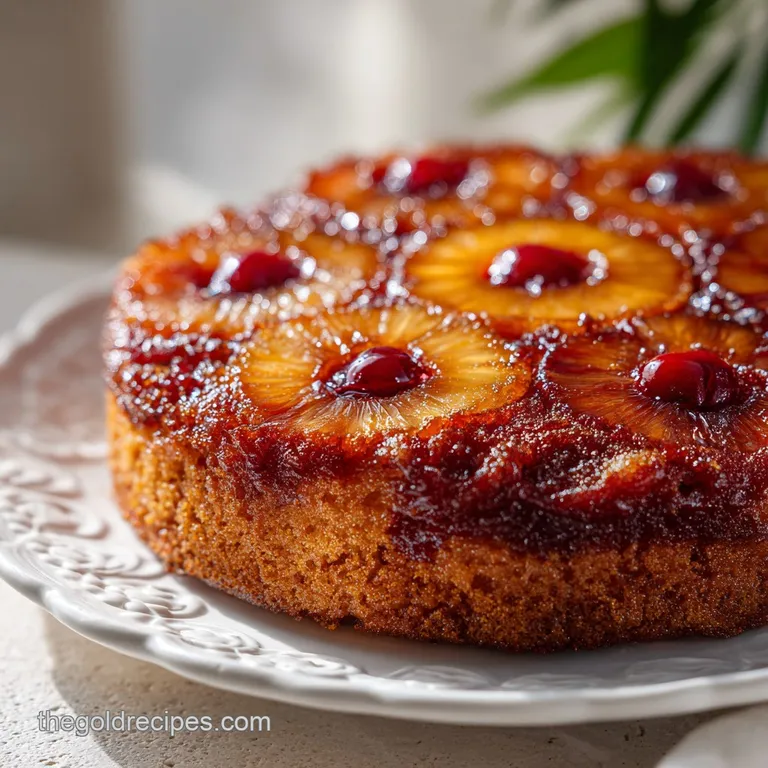
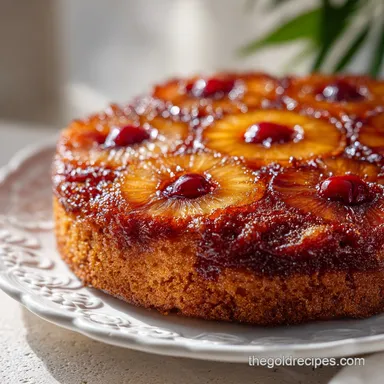
Classic Pineapple Upside Down Cake

- Time: Active 20 minutes, Passive 45 minutes, Total 65 minutes
- Flavor/Texture Hook: Sticky caramelized pineapple rings atop a velvety, golden crumb
- Perfect for: Family Sunday dinners and budget-friendly potluck gatherings
- Mastering the classic pineapple upside down cake recipe
- Vital Statistics for Your Family Favorite Cake
- How the Butter Keeps the Crumb Soft
- Component Analysis for the Best Results
- Selecting the Best Ingredients for the Cake
- Simple Kitchen Tools for Easy Success
- Foolproof Method for Building the Layers
- Avoiding Common Mistakes for a Flawless Flip
- Hearty Variations for Your Pineapple Cake
- Scaling the Recipe for Any Size
- Debunking Classic Baking Myths
- Smart Ways to Store and Reheat Leftovers
- Delightful Serving Ideas for Your Cake
- Recipe FAQs
- 📝 Recipe Card
Mastering the classic pineapple upside down cake recipe
Forget everything you have heard about needing a heavy cast iron skillet to get that legendary caramelized crust. I used to think the same thing, dragging out my heaviest pan and praying the cake wouldn't stick to the seasoned iron.
But honestly, the real hero of the mid century kitchen is the humble 9x13-inch baking pan. You don't need fancy equipment to get that signature golden glow; you just need a bit of patience and the right ratio of butter to brown sugar.
I still remember the first time I tried making this for a big family reunion. I was so nervous about the "flip" that I almost didn't do it. The smell of that 1/2 cup of unsalted butter melting in the oven, followed by the deep, molasses scented aroma of the light brown sugar, filled my kitchen and calmed my nerves.
When I finally inverted that pan and saw the twelve perfect pineapple rings gleaming like stained glass, I knew this was the recipe that would stay in my rotation forever.
This is a hearty, budget friendly dessert that brings everyone to the table without requiring a trip to a specialty grocery store. We are talking about basic pantry staples: flour, sugar, and canned pineapple. It is a reliable classic that feels special every single time you make it.
Whether you are a beginner or a seasoned home cook, this method ensures a moist, sturdy cake that handles the weight of the fruit topping without becoming a soggy mess.
Vital Statistics for Your Family Favorite Cake
When we talk about a reliable bake, the numbers really matter. You want a cake that is tall enough to feel substantial but not so thick that the center stays raw while the edges burn. This recipe is designed for a 9x13-inch pan, which is the gold standard for feeding a crowd.
It yields 12 generous servings, making it ideal for a hearty family meal or a neighborhood gathering.
The timing is the most critical part of this process. You are looking at exactly 20 minutes of active prep time, which includes arranging the fruit and mixing the batter. Then, it spends 45 minutes in the oven. This gives you just enough time to clear the counter and set the table.
The total time of 65 minutes is a small investment for a dessert that looks like it took all afternoon.
| Method | Texture Outcome | Best For |
|---|---|---|
| Canned Rings | Consistent, soft, and very sweet | Quick weeknight family desserts |
| Fresh Pineapple | Firmer bite with a tart finish | Special occasions when fruit is in season |
| Crushed Pineapple | Uniform topping, less visual impact | Busy cooks who want fruit in every bite |
Choosing your fruit method is the first step toward success. While fresh fruit is lovely, the classic canned rings provide that nostalgic, velvety texture that most of us grew up with. Plus, they come with that reserved juice which we use to flavor the batter itself.
It is a zero waste win that keeps the cost low and the flavor high.
How the Butter Keeps the Crumb Soft
The way this cake comes together isn't just luck; it is about how the ingredients interact with heat and each other. We use a specific mixing style that differs from the usual "cream the butter and sugar" routine, and it makes a world of difference in the final texture of the cake.
- Fat Coating: By mixing softened butter into the dry ingredients first, we coat the flour in fat, which limits how much the flour can absorb liquid and prevents a tough, bready cake.
- Thermal Shield: The layer of melted butter and brown sugar at the bottom of the pan acts as a heat buffer, protecting the pineapple from burning while it turns into a sticky glaze.
- Juice Hydration: Using the reserved pineapple juice in the batter adds natural acidity, which reacts with the baking powder to create a light, airy rise.
- Resting Tension: The 10 minute rest after baking allows the caramel to thicken and "grip" the cake, making the flip much cleaner and more successful.
Understanding these simple mechanics helps you avoid the common pitfalls of home baking. When you see the batter come together into a smooth, emulsified mixture, you know you are on the right track for a velvety result.
Component Analysis for the Best Results
Every ingredient in this recipe has a specific job to do, from providing structure to ensuring that the top (which was once the bottom) has that beautiful, glossy sheen. We aren't just throwing things in a bowl; we are building layers of flavor.
| Ingredient | Role in the Cake | Pro Secret |
|---|---|---|
| Light Brown Sugar | Creates the sticky caramel topping | Pack it tightly to ensure even melting and coverage. |
| All Purpose Flour | Provides the hearty structure | Sift it with the baking powder for a more uniform rise. |
| Reserved Juice | Adds flavor and acidity | Always measure exactly 1/2 cup to keep the hydration balanced. |
| Buttermilk | Ensures a moist, tender crumb | Use room temperature buttermilk to prevent the batter from curdling. |
Selecting your elements carefully is the secret to a great bake. For example, using unsalted butter allows you to control the saltiness perfectly. If you are interested in how different butter ratios affect your baking, you might find the texture of my Golden Homemade Biscuits a fascinating comparison, as both recipes rely on high-quality fats for their signature crumb.
Selecting the Best Ingredients for the Cake
Most of these items are already in your pantry, which is why this is such a budget friendly favorite. I always keep a can of pineapple rings on the shelf just in case we need a quick dessert for a last minute guest.
- 1/2 cup (113g) unsalted butter: Melted directly in the pan for the base. Why this? It creates the non stick caramel layer.
- 1 cup (200g) light brown sugar: Packed firmly. Why this? Provides the molasses notes for the topping.
- 1 can (20 oz) pineapple rings: Drained, reserving the juice. Why this? The uniform rings look beautiful in a 9x13 pan.
- 15 maraschino cherries: Patted dry. Why this? Adds a pop of color and vintage flair.
- 2.5 cups (312g) all purpose flour: The foundation of our cake. Why this? Gives a hearty, reliable structure.
- 1.5 cups (300g) granulated sugar: For the cake batter. Why this? Ensures a sweet, golden crumb.
- 2.5 tsp baking powder: Our leavening agent. Why this? Makes the cake light and airy.
- 0.5 tsp salt: To balance the sweetness. Why this? Sharpens all the other flavors.
- 3/4 cup (170g) unsalted butter: Softened to room temperature. Why this? Used for the reverse aeration mixing method.
- 1/2 cup (120ml) reserved pineapple juice: From the can. Why this? Infuses the cake with fruit flavor.
- 1/2 cup (120ml) buttermilk: Room temperature is best. Why this? Adds moisture and a slight tang.
- 3 large eggs: Room temperature. Why this? Provides lift and binds the batter.
- 2 tsp vanilla extract: For that classic aroma. Why this? Rounds out the sweetness of the fruit.
If you don't have buttermilk on hand, you can easily swap it for 1/2 cup of whole milk mixed with 1/2 teaspoon of lemon juice or white vinegar. Let it sit for 5 minutes until it curdles slightly, and you've got a perfect budget friendly substitute that works exactly the same way.
Simple Kitchen Tools for Easy Success
You don't need a kitchen full of gadgets for this one. I am a big believer in using what you have. A basic 9x13-inch metal or glass baking pan is all you need for the base. If you use a glass pan, just keep an eye on the edges, as they tend to brown a bit faster than metal.
An electric hand mixer is great for getting the batter smooth, but you can definitely do this by hand with a sturdy whisk and some elbow grease. The "reverse aeration" method mixing the butter into the flour is actually easier to do by hand than the traditional creaming method because you are just looking for a coarse crumb texture rather than a light and fluffy one at the start.
Foolproof Method for Building the Layers
- Place 1/2 cup butter in a 9x13-inch baking pan and place in the oven while preheating to 350°F (175°C) until melted and sizzling.
- Remove pan from oven and sprinkle 1 cup of brown sugar evenly over the melted butter until no yellow butter is visible.
- Arrange 12 dried pineapple rings in three rows of four, and place a cherry in the center of each ring until the bottom is fully decorated.
- In a large mixing bowl, whisk together 2.5 cups flour, 1.5 cups sugar, 2.5 tsp baking powder, and 0.5 tsp salt.
- Add 3/4 cup softened butter and mix on low until the mixture resembles coarse, sandy crumbs. Note: This prevents gluten development for a softer cake.
- Pour in 1/2 cup pineapple juice, 1/2 cup buttermilk, 3 eggs, and 2 tsp vanilla extract.
- Beat with an electric mixer until the batter is smooth, thick, and velvety.
- Carefully pour the batter over the pineapple arrangement, smoothing the top with a spatula until the fruit is completely covered.
- Bake for 45 minutes until a toothpick inserted into the center comes out clean and the edges are pulling away from the pan.
- Allow the cake to rest in the pan for exactly 10 minutes, then invert onto a large platter until you hear the cake release with a soft thud.
Chef's Tip: Use a paper towel to pat the pineapple rings and cherries bone dry before placing them in the sugar. Any excess water will thin out your caramel and might make the top of the cake soggy. We want a thick, sticky glaze, not a watery syrup.
Avoiding Common Mistakes for a Flawless Flip
The "flip" is usually the part that makes people nervous, but if you follow the 10 minute rule, it is actually quite simple. If you flip too early, the caramel is still too liquid and will run off the sides. If you wait too long, the sugar will cool and harden, sticking the fruit to the bottom of the pan forever.
Set a timer the moment that pan hits the cooling rack.
Fixing Common Problems with Your Topping
| Problem | Root Cause | Solution |
|---|---|---|
| Fruit sticks to pan | Waited too long to flip the cake | Warm the bottom of the pan over a low burner for 30 seconds to re melt sugar. |
| Soggy bottom layer | Pineapple rings were too wet | Always pat the fruit dry with paper towels before arranging. |
| Cake is too dense | Over mixed after adding the liquids | Stop mixing as soon as the batter is smooth and no flour streaks remain. |
Getting the temperature right is another big factor. Make sure your eggs and buttermilk are at room temperature. Cold ingredients can cause the softened butter to clump up, leading to an uneven bake. If you forgot to take them out of the fridge, just put the eggs in a bowl of warm water for 5 minutes.
Common Mistakes Checklist
- ✓ Always pat the pineapple rings and cherries dry to prevent a watery topping.
- ✓ Preheat your oven fully to 350°F before the cake goes in.
- ✓ Use a timer for the 10 minute resting period after baking.
- ✓ Don't skip the "reverse aeration" mixing it is what makes the crumb velvety.
- ✓ Check for doneness with a toothpick; every oven runs slightly different.
- ✓ Ensure the brown sugar is spread in an even layer over the butter.
Hearty Variations for Your Pineapple Cake
While the classic version is hard to beat, there are ways to mix things up if you want to use what you have in the pantry. If you are out of pineapple, this method works beautifully with sliced peaches or even rings of tart apples. The caramel base is very forgiving and loves almost any fruit.
If you are looking for a completely different kind of hearty meal to serve before dessert, you might enjoy my Simple Meat Stuffed Potato Cakes. They are another great 45 minute dinner alternative for family nights that focus on simple, budget friendly ingredients. Much like this cake, they rely on a golden, crispy exterior to deliver that comfort food feel.
If you want a deeper flavor, try using dark brown sugar instead of light. It has more molasses and will give the topping a more intense, almost burnt sugar character. You can also add a pinch of cinnamon or ginger to the dry ingredients for a spiced vintage twist that smells incredible while it bakes.
Scaling the Recipe for Any Size
If you are only cooking for two, you can easily cut this recipe in half and bake it in an 8x8-inch square pan. You will need to reduce the bake time by about 5 to 10 minutes, so start checking it at the 35 minute mark.
For the eggs, beat one egg in a small bowl and use half of it to get the measurements right.
When scaling up for a big party, it is best to make two separate 9x13-inch cakes rather than trying to double the recipe into one giant pan. This ensures the center cooks through without the edges getting dry.
If you do bake two at once, rotate your pans halfway through the 45 minute bake time to ensure they both get even heat from your oven.
Debunking Classic Baking Myths
One common myth is that you need to use "cake flour" to get a tender result. In this recipe, we use all purpose flour because it provides the hearty structure needed to support the fruit. The tenderness comes from the mixing method, not a special expensive flour.
By coating the flour in butter first, we mimic the effect of a lower protein flour without the extra cost.
Another myth is that you should never use canned fruit if you want a "gourmet" result. Honestly, for this specific cake, canned pineapple is often superior. It is consistently sweet and has been softened by the canning process, which means it merges perfectly with the cake crumb.
Fresh pineapple can sometimes stay too fibrous or release too much unpredictable moisture, which can ruin the texture of the topping.
Smart Ways to Store and Reheat Leftovers
This cake actually holds up surprisingly well because the fruit and caramel layer keeps the top moist. You can keep it at room temperature, covered tightly with plastic wrap, for up to 2 days.
If you live in a very humid area, I recommend putting it in the fridge after the first 24 hours to keep the fruit fresh.
In the fridge, the cake will last up to 4 days. When you are ready for a second slice, a quick 15 second zap in the microwave will soften the caramel and bring that velvety texture back to life. It is like having a fresh baked dessert all over again.
For zero waste cooking, don't throw away any leftover pineapple juice if you didn't use the whole can. You can freeze it in an ice cube tray and drop a cube into a glass of sparkling water or use it in a marinade for chicken later in the week.
The maraschino cherry juice is also great for adding to a simple glaze for holiday ham or even just stirring into some lemonade for the kids.
Delightful Serving Ideas for Your Cake
This cake is so beautiful on its own that it doesn't need much. However, serving it slightly warm with a dollop of cold whipped cream or a scoop of vanilla bean ice cream is a total crowd pleaser. The way the cold cream melts into the warm pineapple caramel is something your family will ask for again and again.
If you are serving this at a potluck, you can pre slice it into 12 squares, making sure each square has a full pineapple ring and a cherry in the center. It makes for a very impressive presentation on a large platter. Since it is a hearty, sturdy cake, it travels well and won't fall apart in the car.
It is the ultimate family favorite that has stood the test of time for a reason it is simple, honest, and truly satisfying.

Recipe FAQs
What are common upside down cake mistakes?
Failing to pat the fruit dry is the most frequent error. Excess moisture creates a watery caramel layer, so always dry your pineapple rings and cherries thoroughly before arranging them in the pan.
What is the best cake to use for pineapple upside down cake?
A tender, structured butter cake is ideal. Using the reverse aeration method mixing softened butter into the dry ingredients until crumbs form ensures a velvety crumb that holds its own against the syrupy fruit topping.
What is the 1234 cake rule?
This refers to the traditional ratio of 1 part butter, 2 parts sugar, 3 parts flour, and 4 eggs. While this recipe relies on specific proportions for structural integrity, mastering this fundamental fat-to-flour ratio helps you understand the balance between a light crumb and the density required for a moist upside down cake.
Do you flip a pineapple upside down cake when it's hot or cold?
Invert the cake while it is still warm, exactly 10 minutes after baking. This rest period is mandatory; it allows the caramel to set slightly so the fruit stays in place, but flipping while still warm prevents the sugar from sticking permanently to the pan.
Is it true I must flip the cake immediately after taking it out of the oven?
No, this is a common misconception. Flipping immediately will cause the structure to collapse because the crumb hasn't stabilized, while waiting too long lets the caramel harden and lock the cake to the pan.
How to ensure the pineapple slices don't stick to the pan?
Spread the brown sugar in a perfectly even layer over the melted butter before placing the fruit. This creates a uniform barrier that promotes smooth release and prevents localized hot spots that lead to burning or sticking.
How to check if the cake is finished baking?
Insert a toothpick into the center of the cake and look for a clean exit. Since every oven behaves differently, rely on this visual cue after 45 minutes of baking rather than just the timer to guarantee the cake is fully cooked without drying out.
Classic Pineapple Upside Down Cake
Ingredients:
Instructions:
Nutrition Facts:
| Calories | 481 kcal |
|---|---|
| Protein | 4.2 g |
| Fat | 20.3 g |
| Carbs | 69.8 g |
| Fiber | 1.3 g |
| Sugar | 48.2 g |
| Sodium | 208 mg |
